Affiliate Disclaimer: This post contains affiliate links. If you click through and make a purchase, FemmeGlowDaily may earn a small commission at no extra cost to you. Thank you for supporting the site!
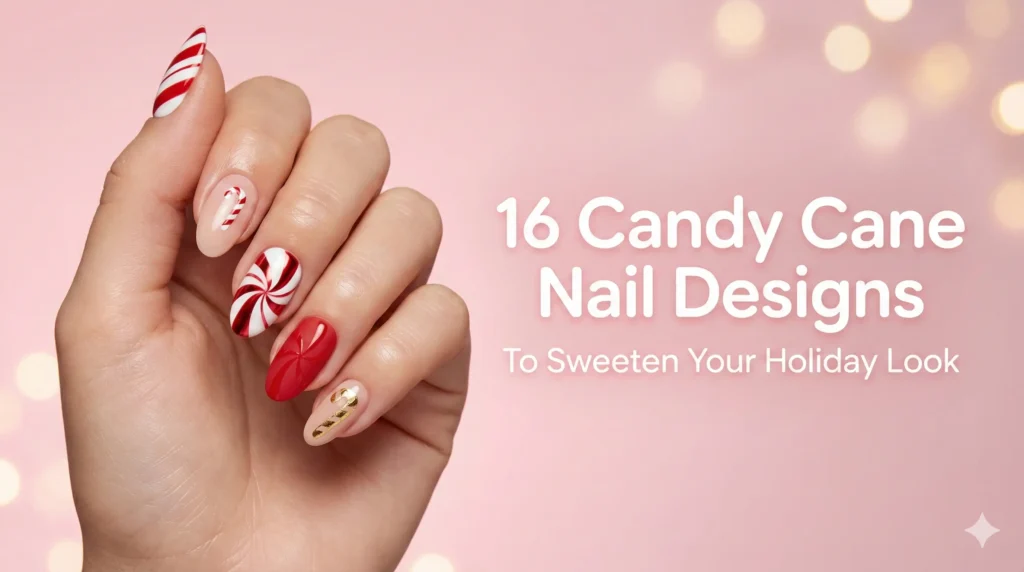
16 Candy Cane Nail Designs That Will Make Your Holiday Look Sweeter
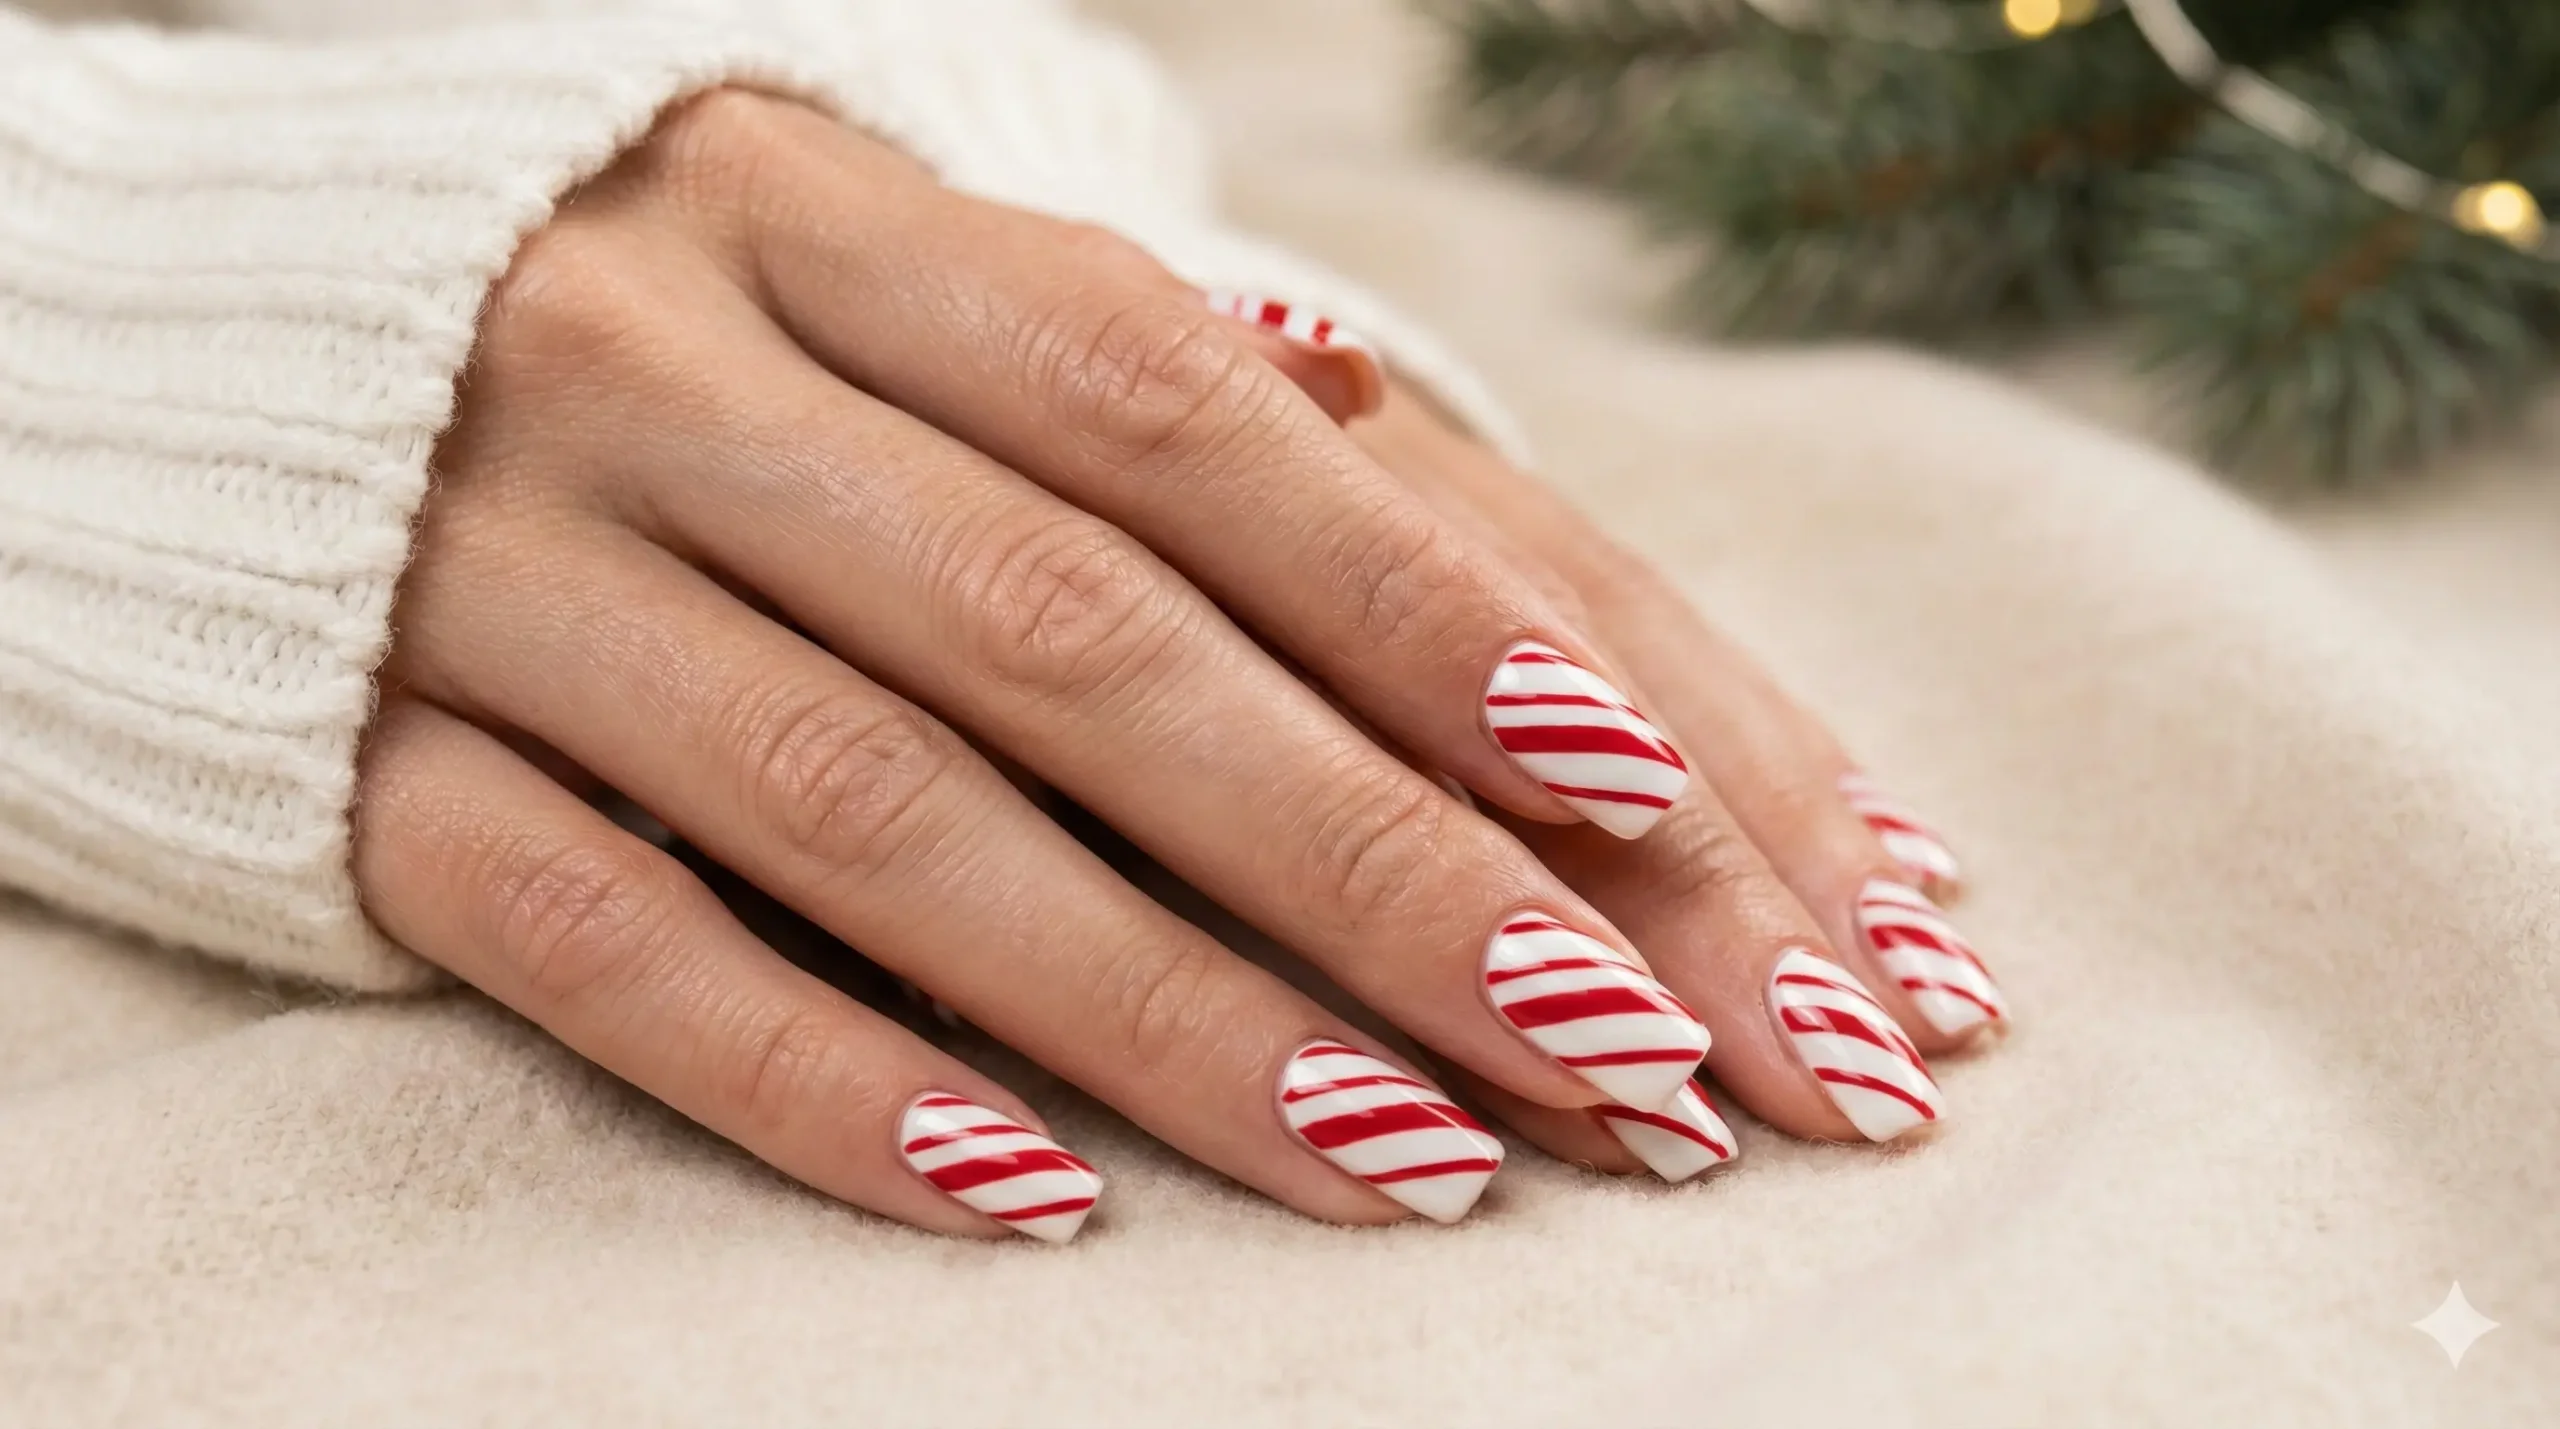
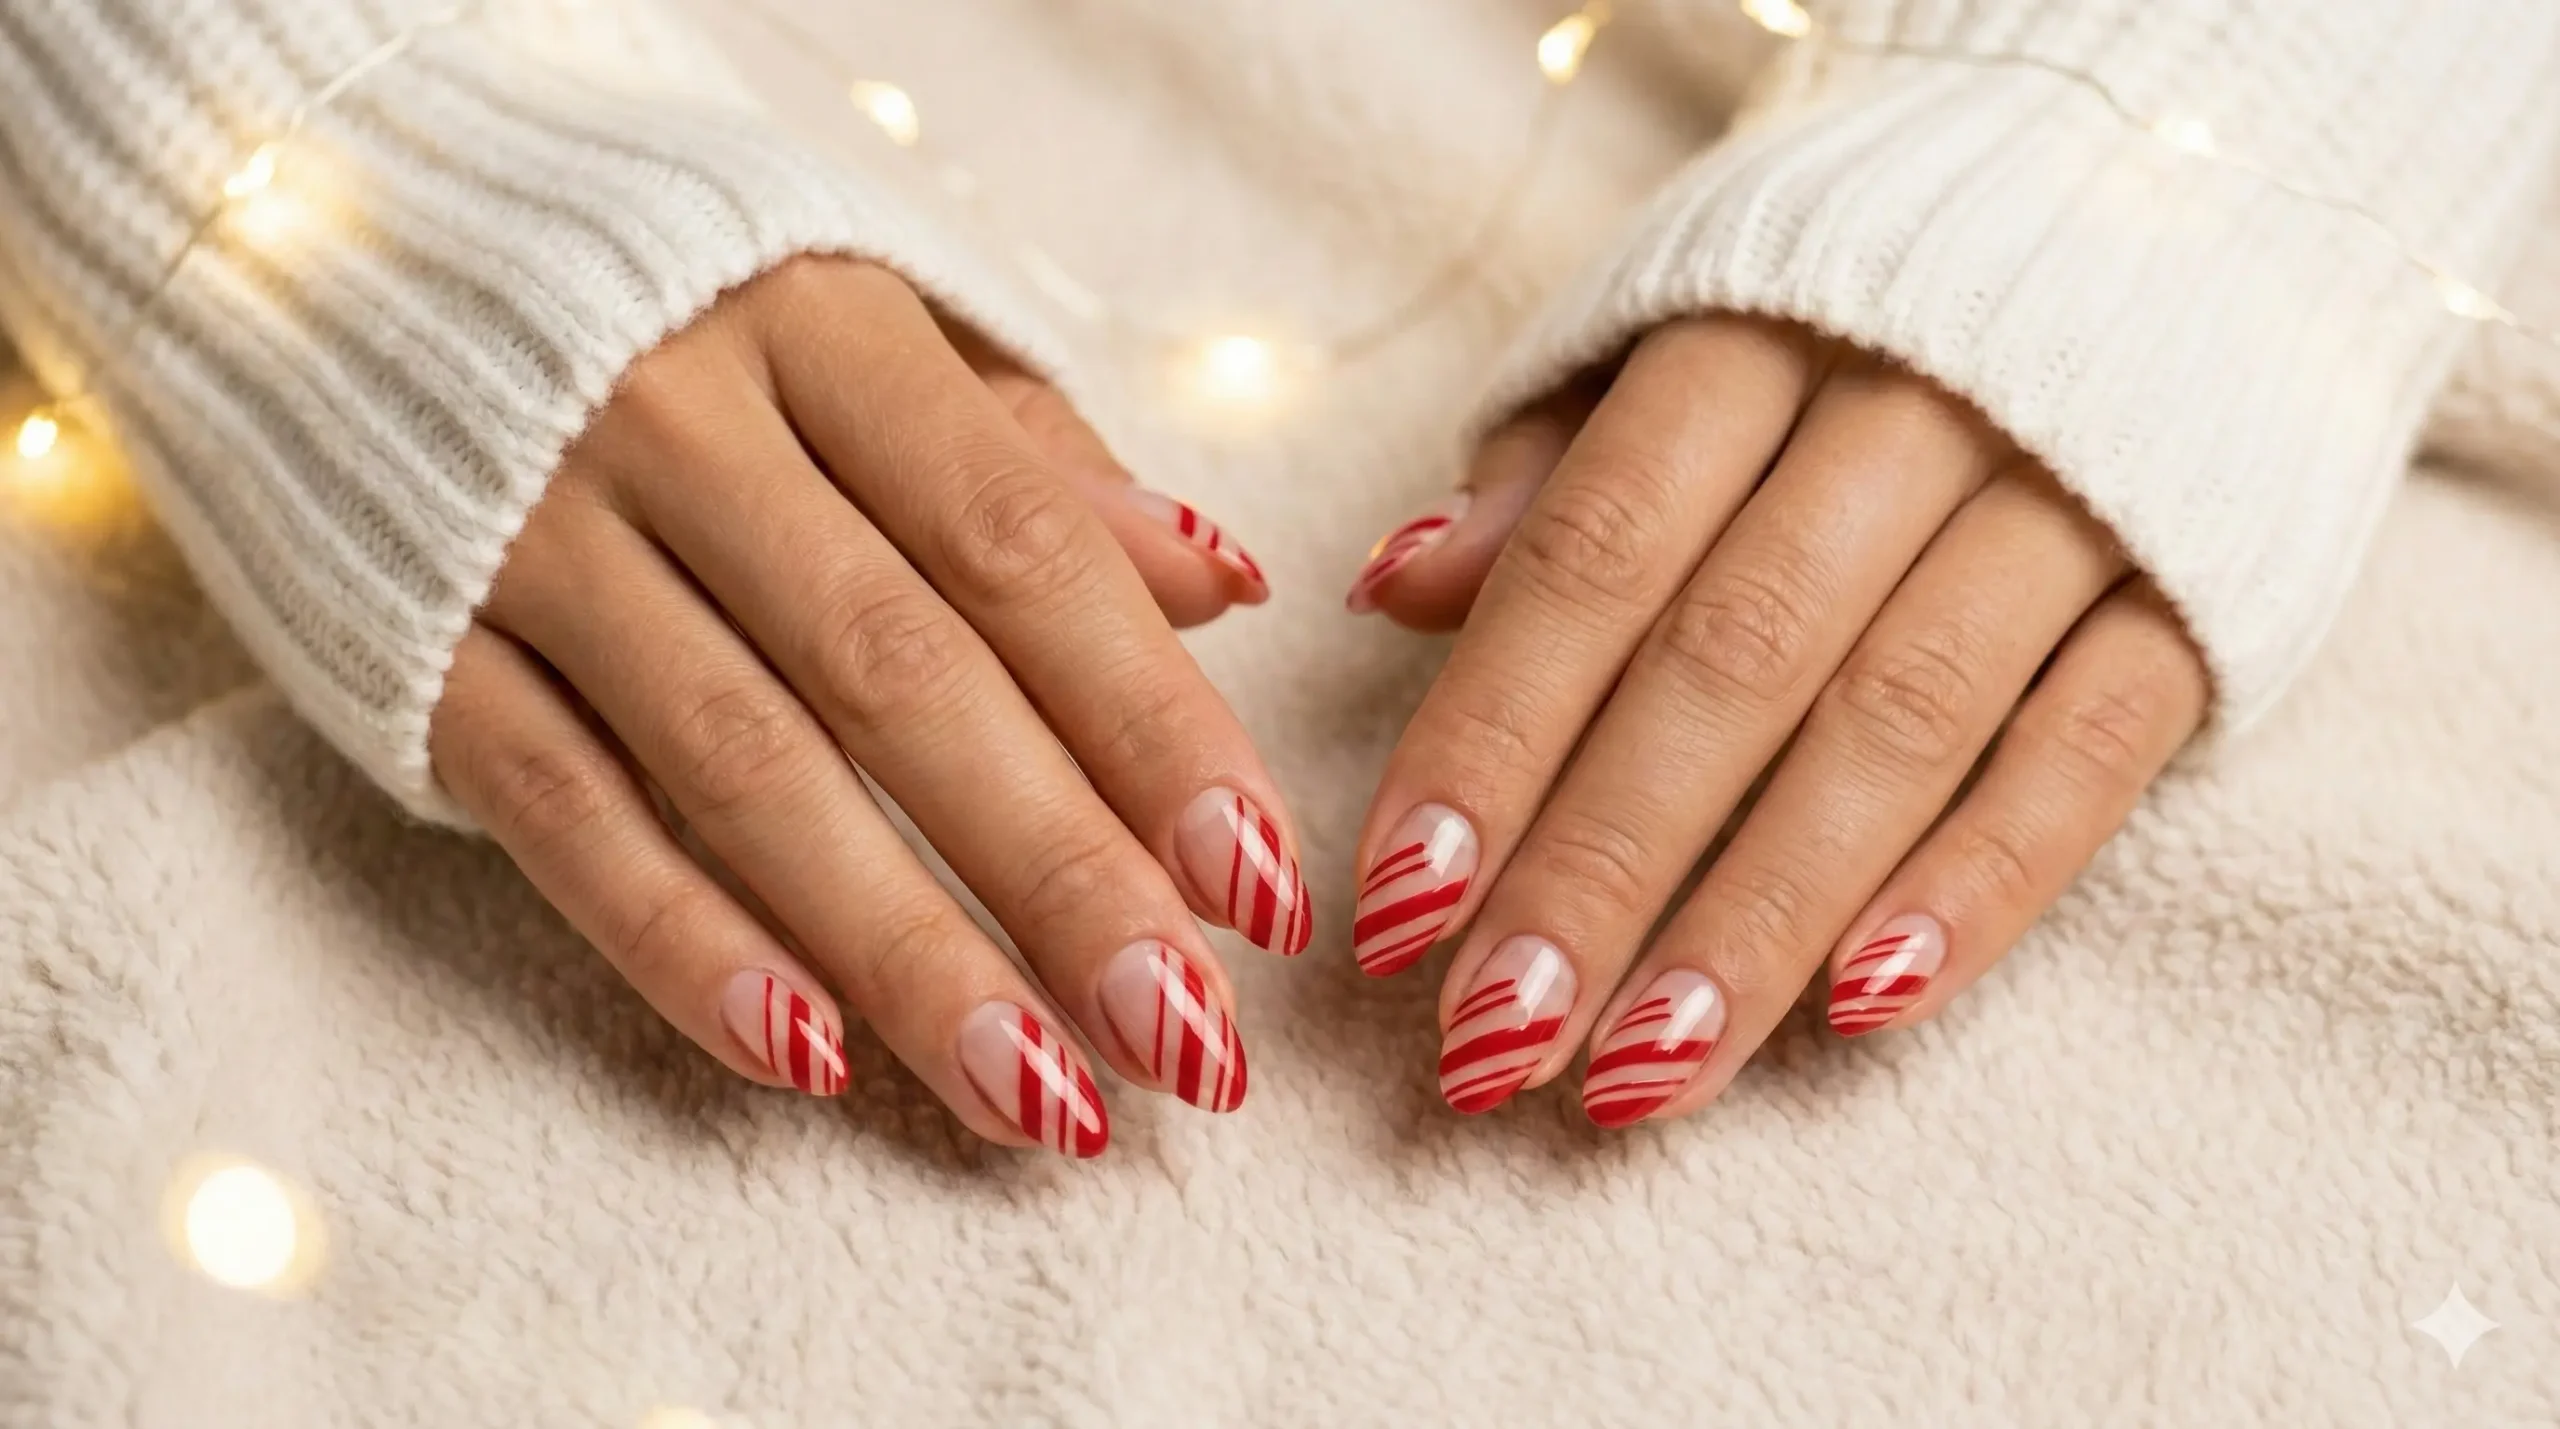
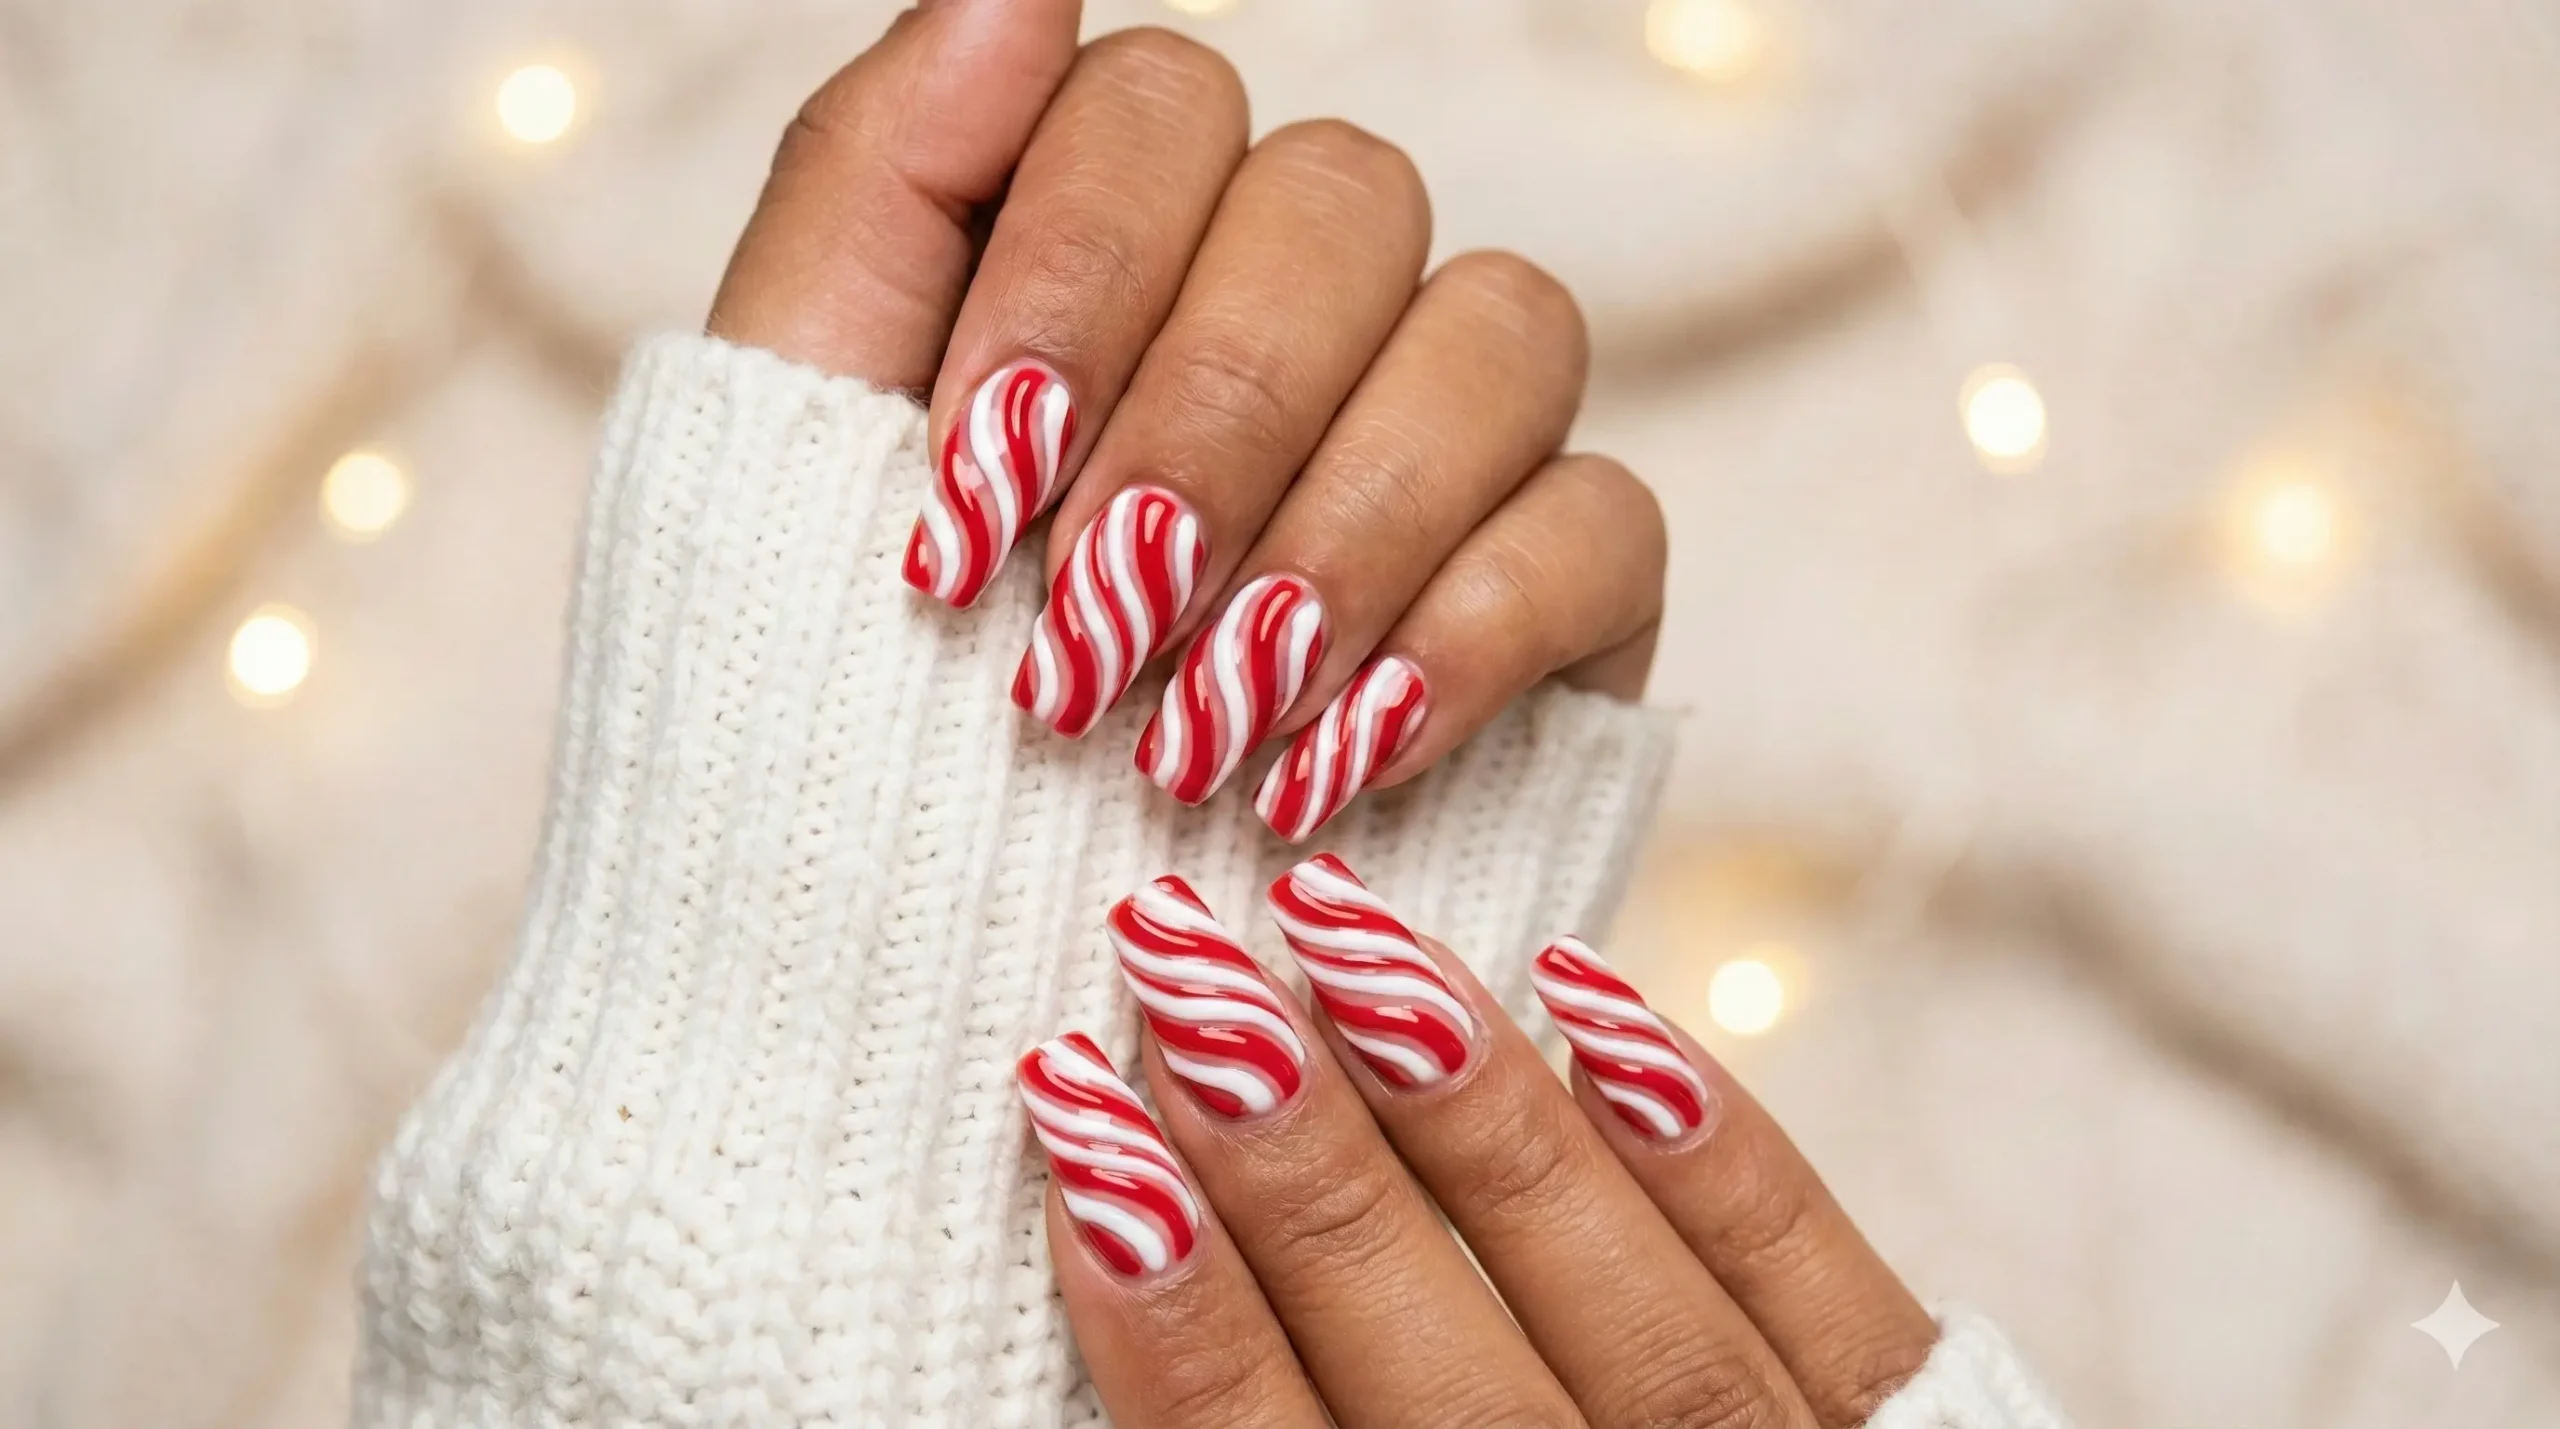
1. Classic Candy Cane Nails
Main Points
- Glossy red & white diagonal stripes
- Classic Christmas aesthetic
- Works on short or long nails
How to Make This Design
- Prep nails: clean, push back cuticles, buff, and apply nail dehydrator/primer if using gels.
- Apply a white gel or polish base layer and cure (if using gel) or allow to fully dry.
- Using striping tape or a fine detail brush, paint diagonal red stripes across each nail. Keep spacing even for a clean look.
- Remove striping tape (if used) carefully. Clean edges with a tiny brush dipped in remover to sharpen lines.
- Apply a glossy top coat and cure (or let dry) to seal and add shine.
- Finish with cuticle oil and gentle hand massage for a polished look.
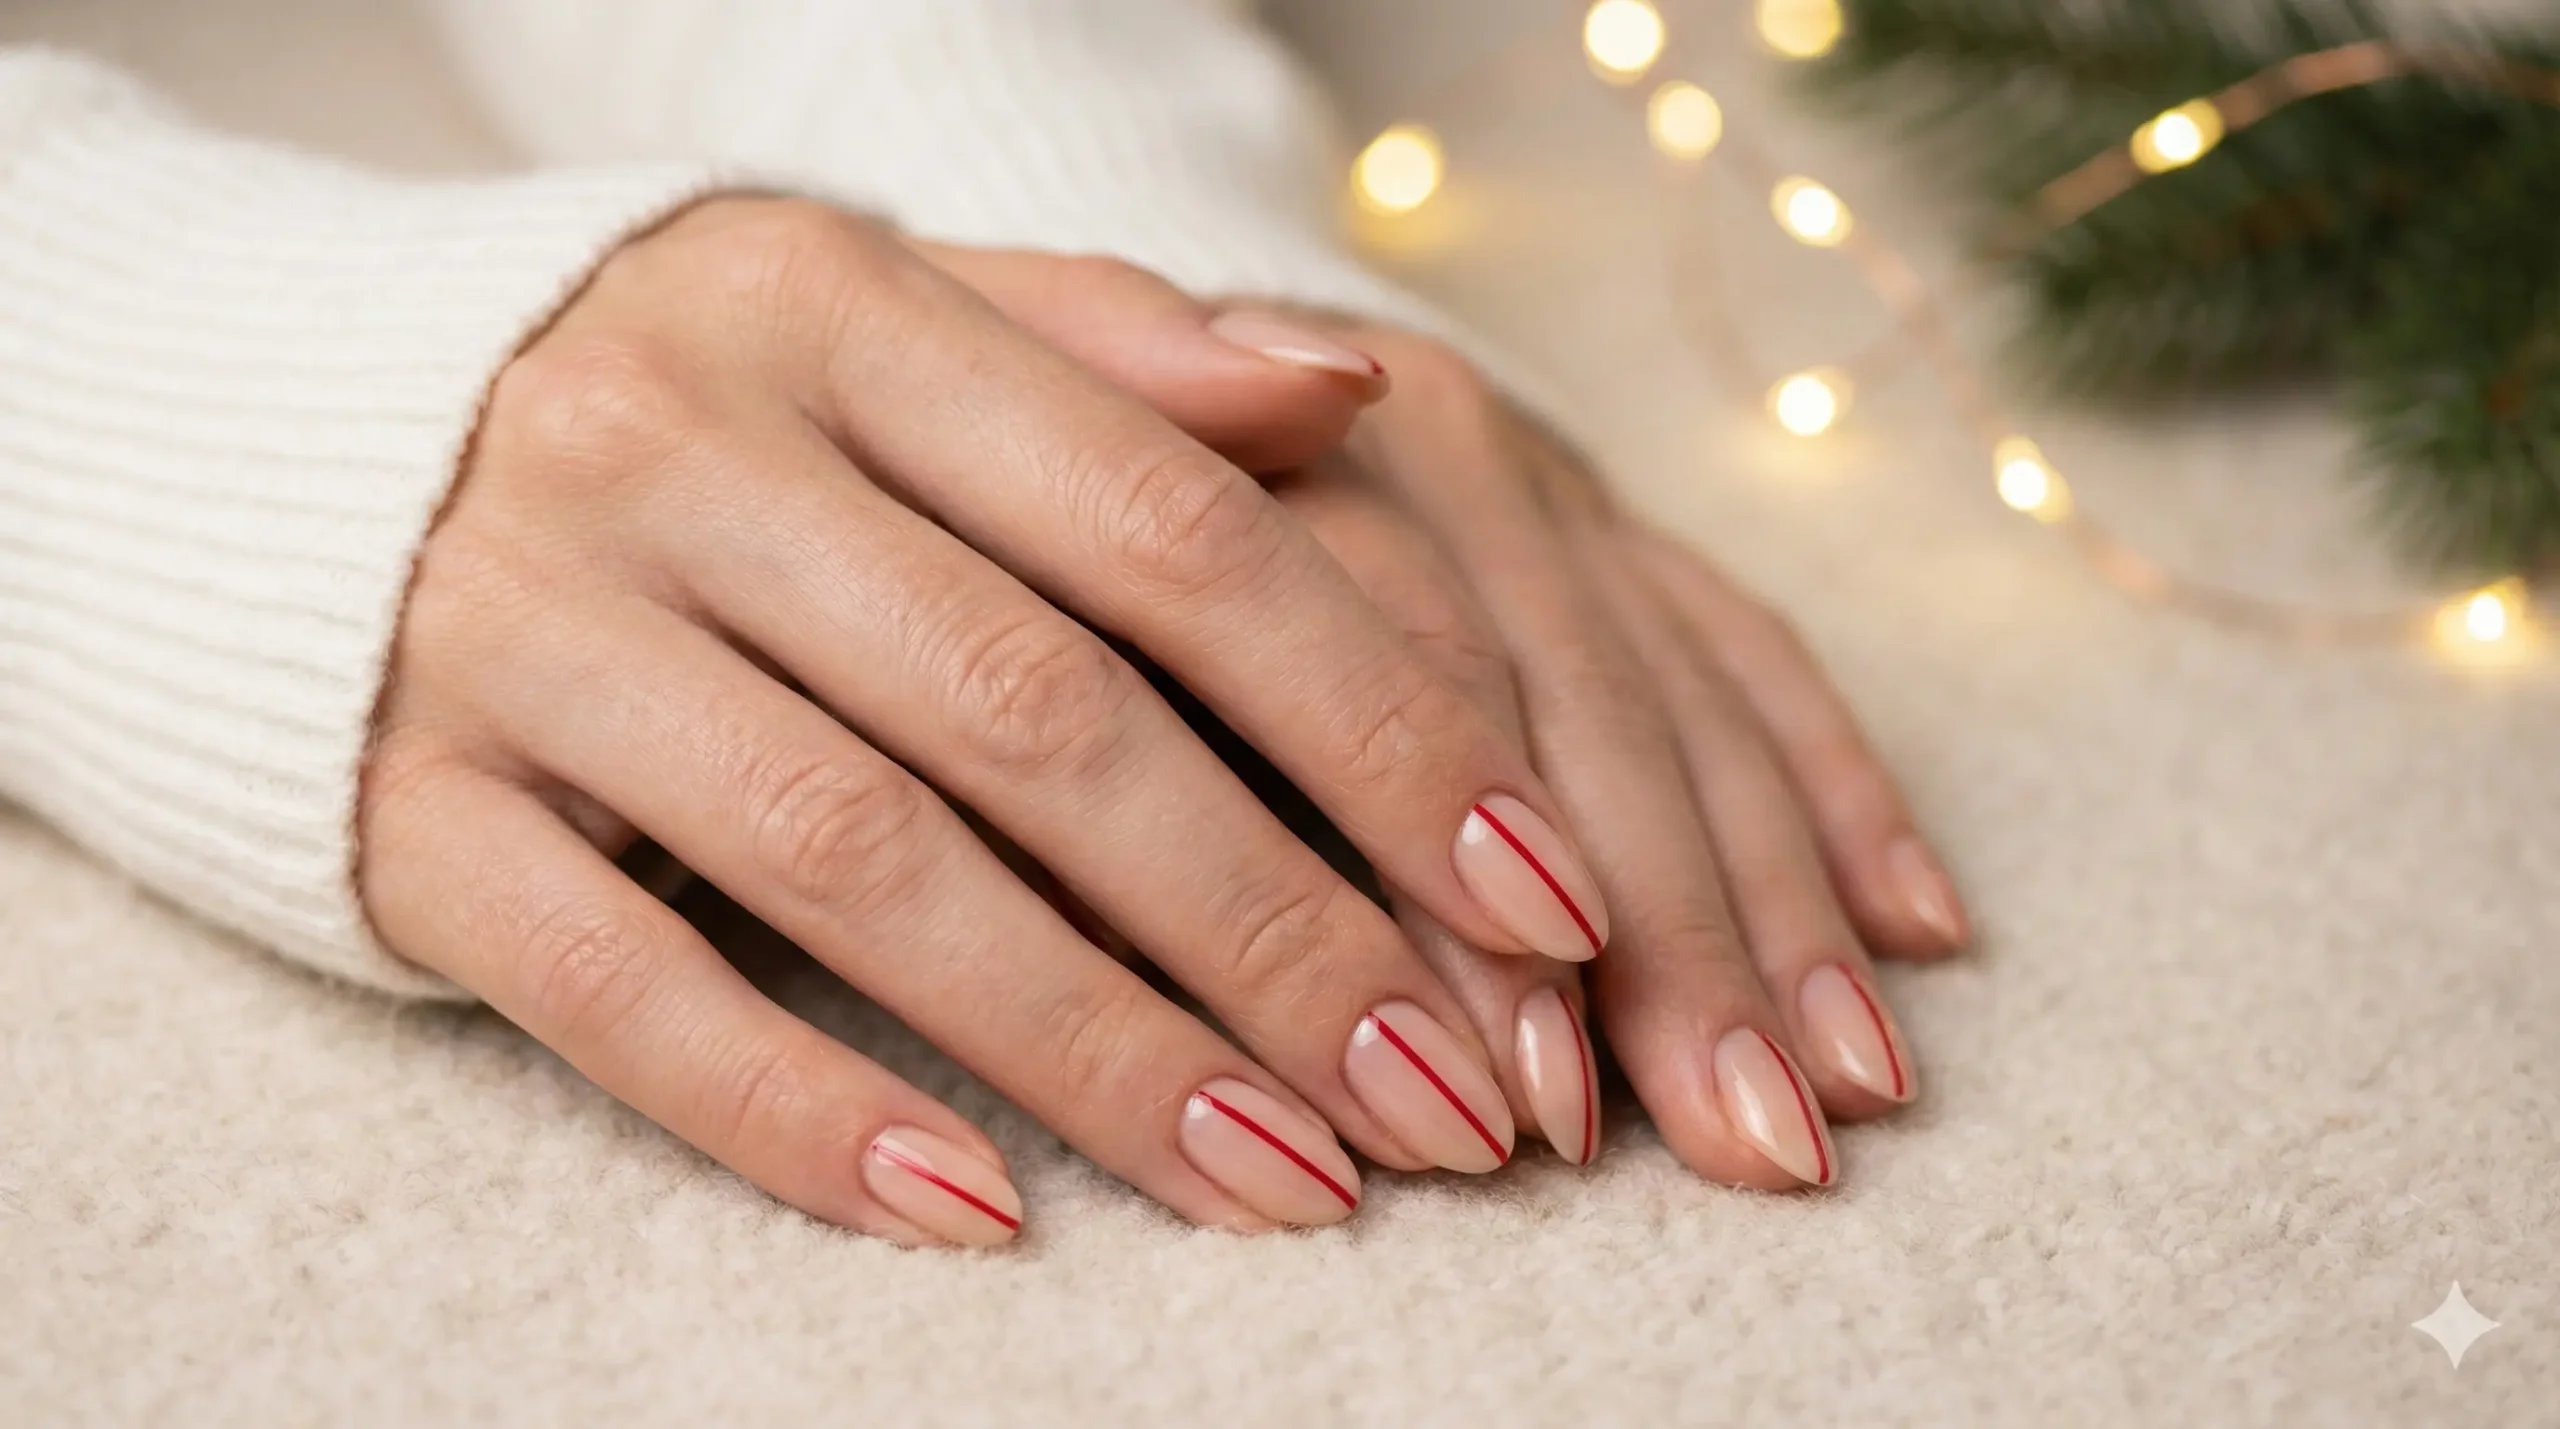
2. Minimal Nude Candy Cane Accent
Main Points
- Sheer nude glossy base
- One thin red candy cane stripe per nail
- Perfect minimalist holiday manicure
How to Make This Design
- Apply a sheer nude or milky base coat and let it fully dry or cure under a UV lamp.
- Using a fine detail brush, paint one thin red diagonal stripe on each nail.
- Keep spacing consistent for a clean minimalist aesthetic.
- Seal the design with a glossy top coat for shine.
- Finish with cuticle oil for a hydrated, polished look.
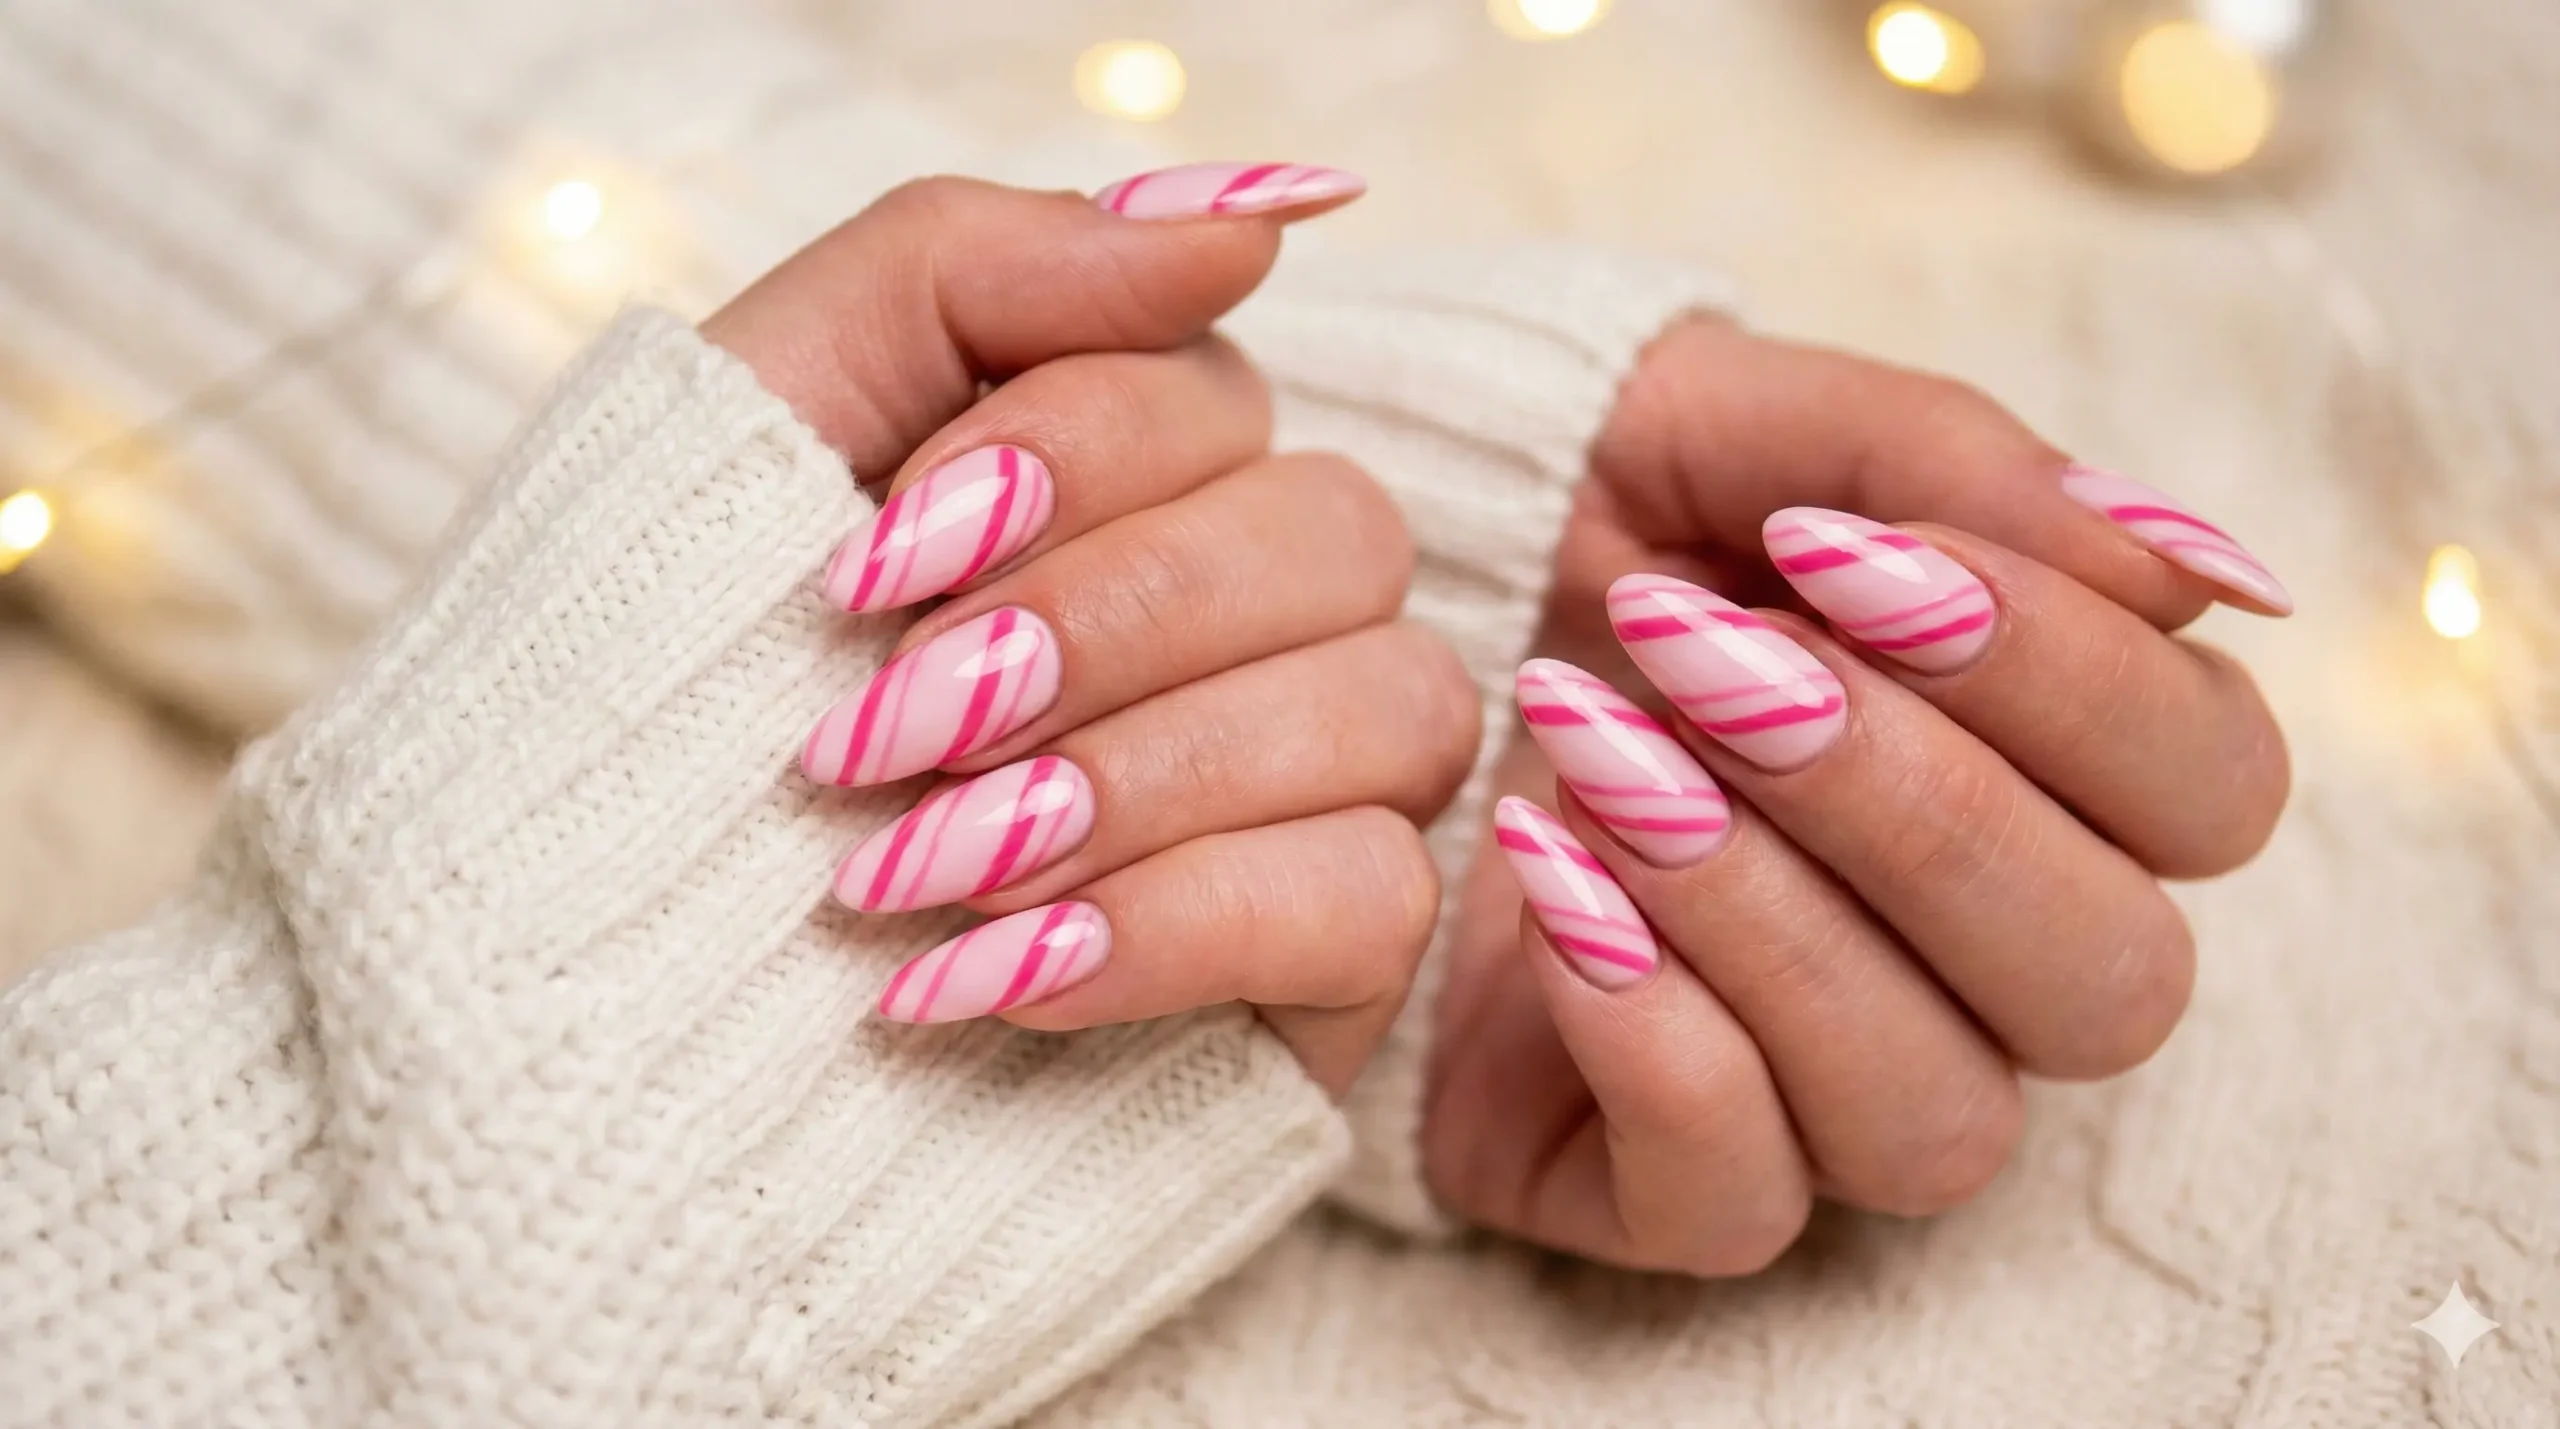
3. Barbie Pink Candy Cane Nails
Main Points
- Baby pink glossy base
- Hot-pink candy cane stripes
- Playful Barbie-inspired holiday twist
How to Make This Design
- Apply a pastel baby pink base coat and cure or allow to dry.
- Use a fine brush to paint thin hot-pink candy cane stripes.
- Keep lines sharp for a crisp, modern Barbie-core vibe.
- Apply a glossy top coat to enhance shine and blend tones smoothly.
- Finish with cuticle oil for a glam, moisturized finish.
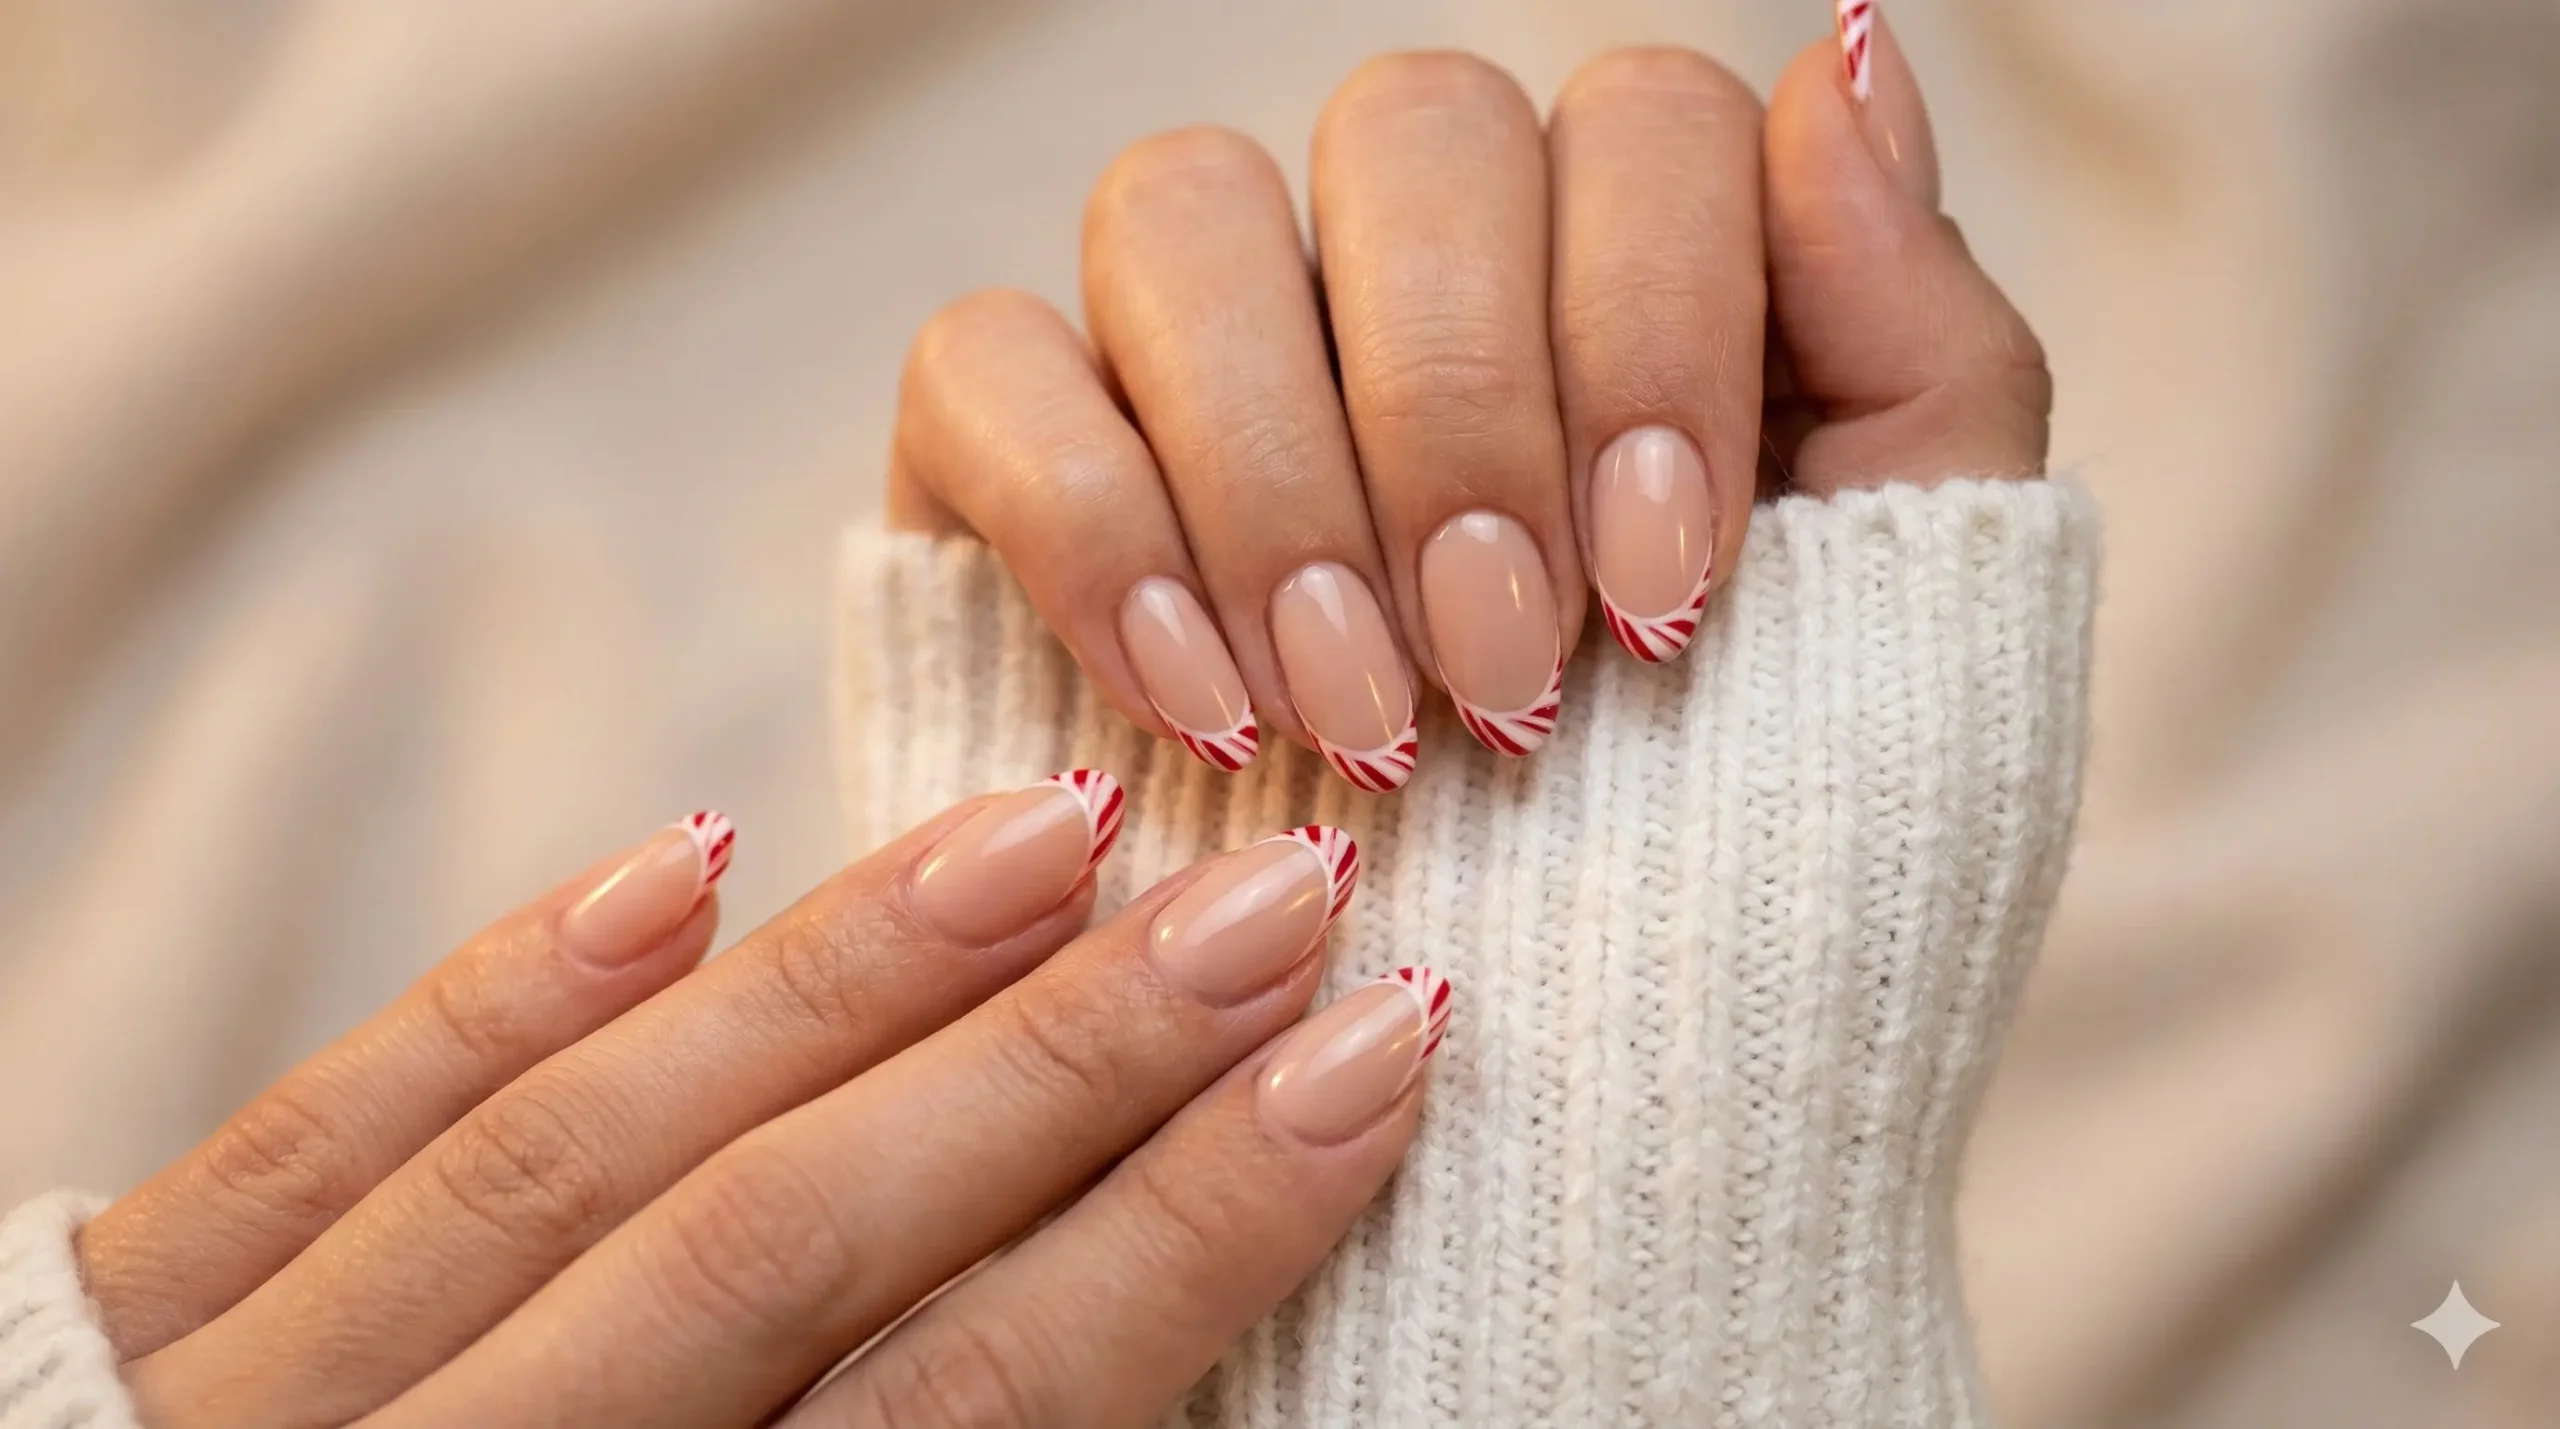
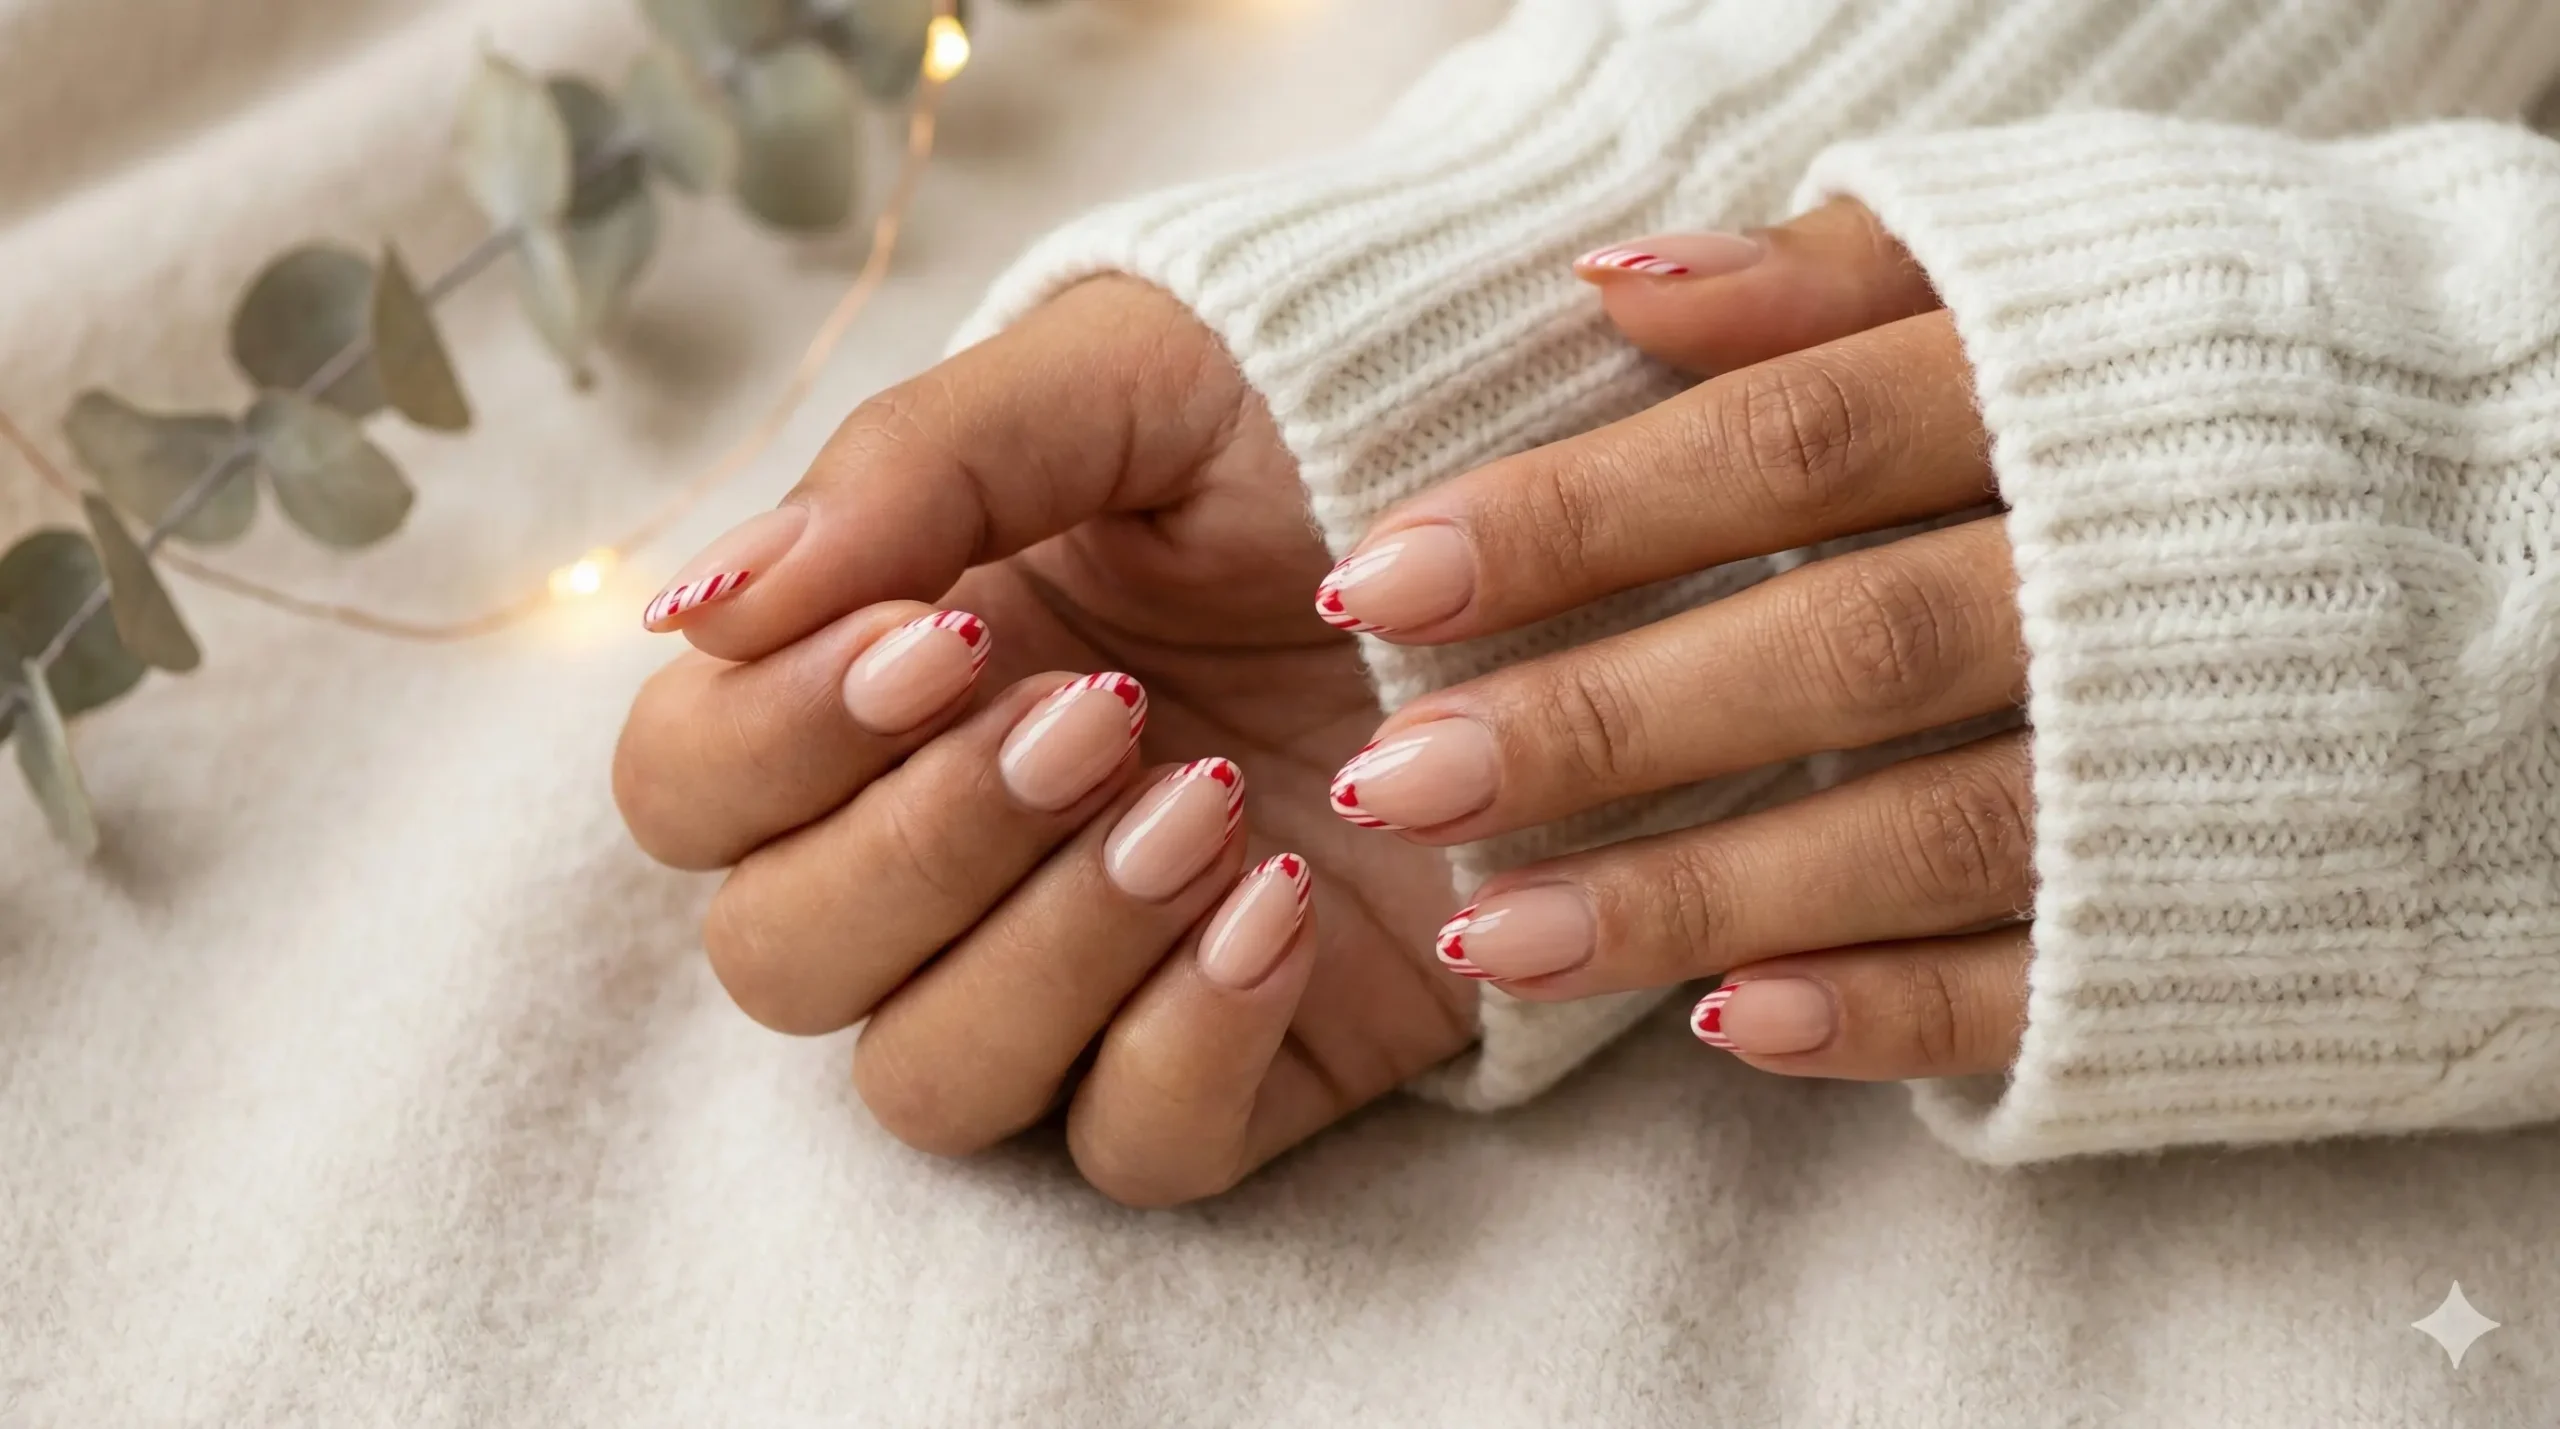
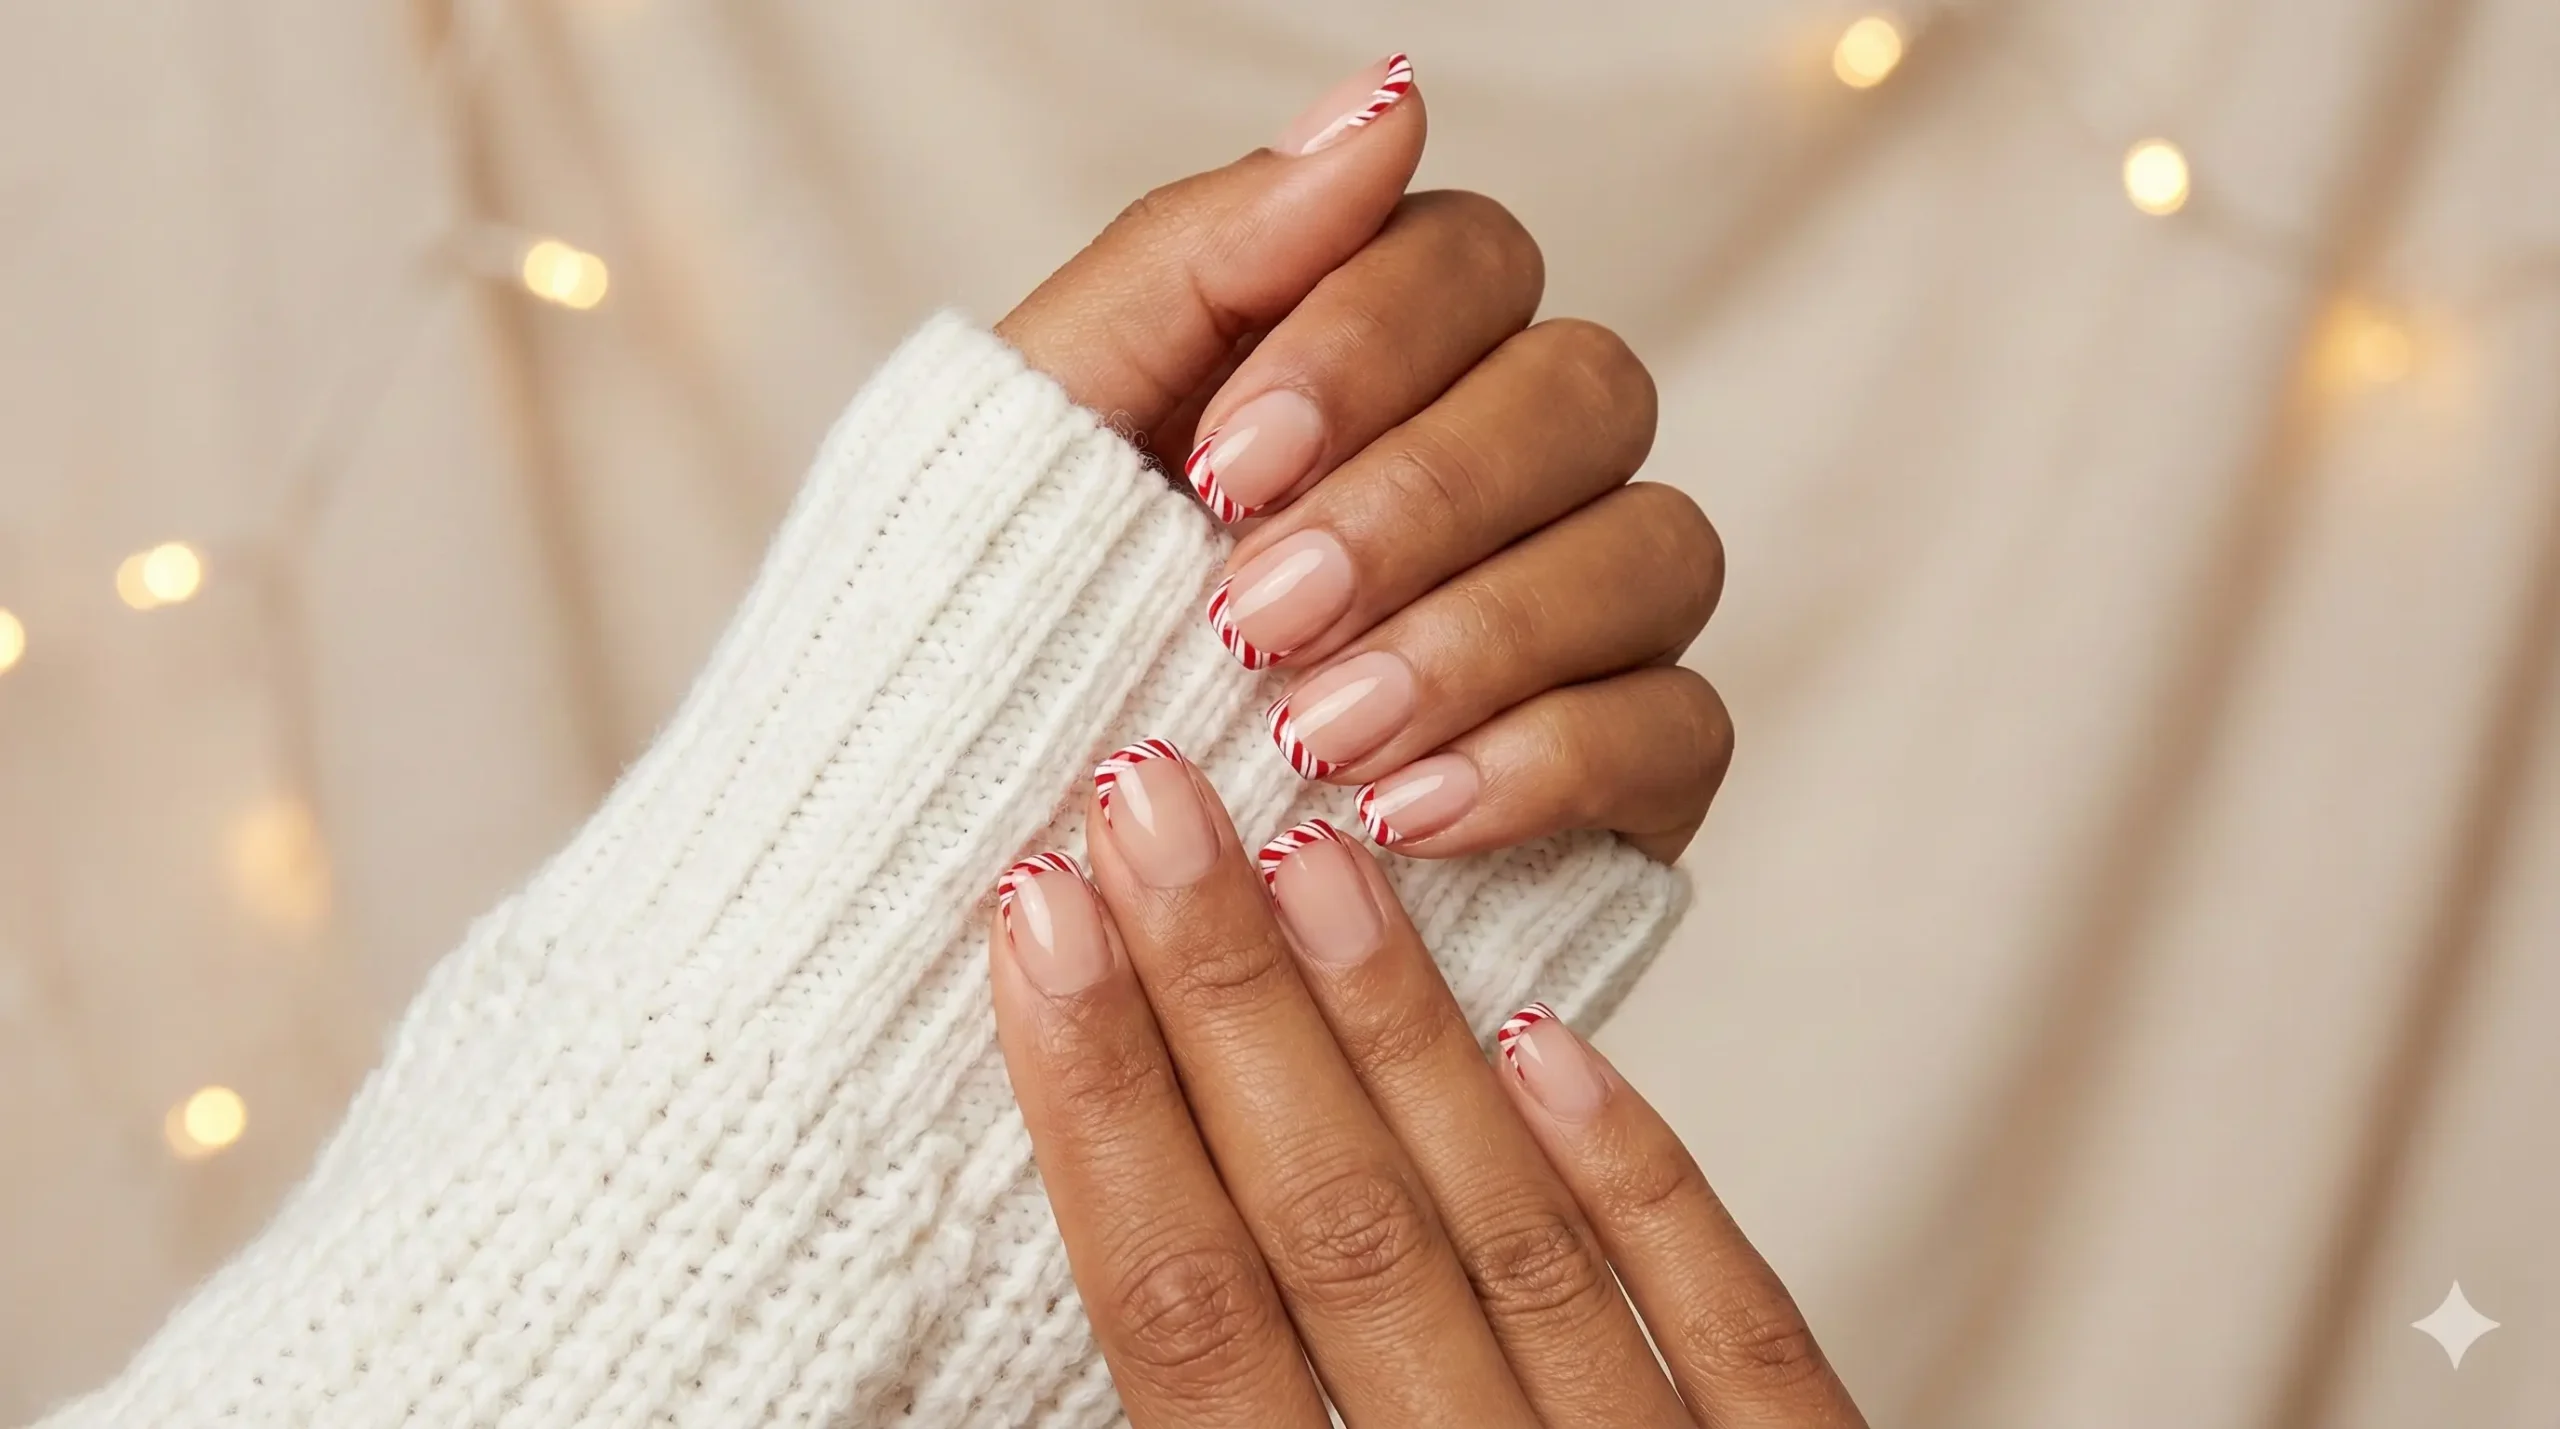
4. Candy Cane French Tips
Main Points
- Nude base with striped candy cane French tips
- Elegant and timeless holiday look
- Perfect for almond, square, or coffin nails
How to Make This Design
- Apply a natural nude base coat and cure or dry fully.
- Using a detail brush, paint alternating red and white lines along the tip of each nail.
- Shape the candy cane French curve to match the nail’s natural contour.
- Apply a glossy top coat to achieve a smooth, polished finish.
- Finish with nourishing cuticle oil.
5. Chrome Metallic Red Candy Cane Stripes
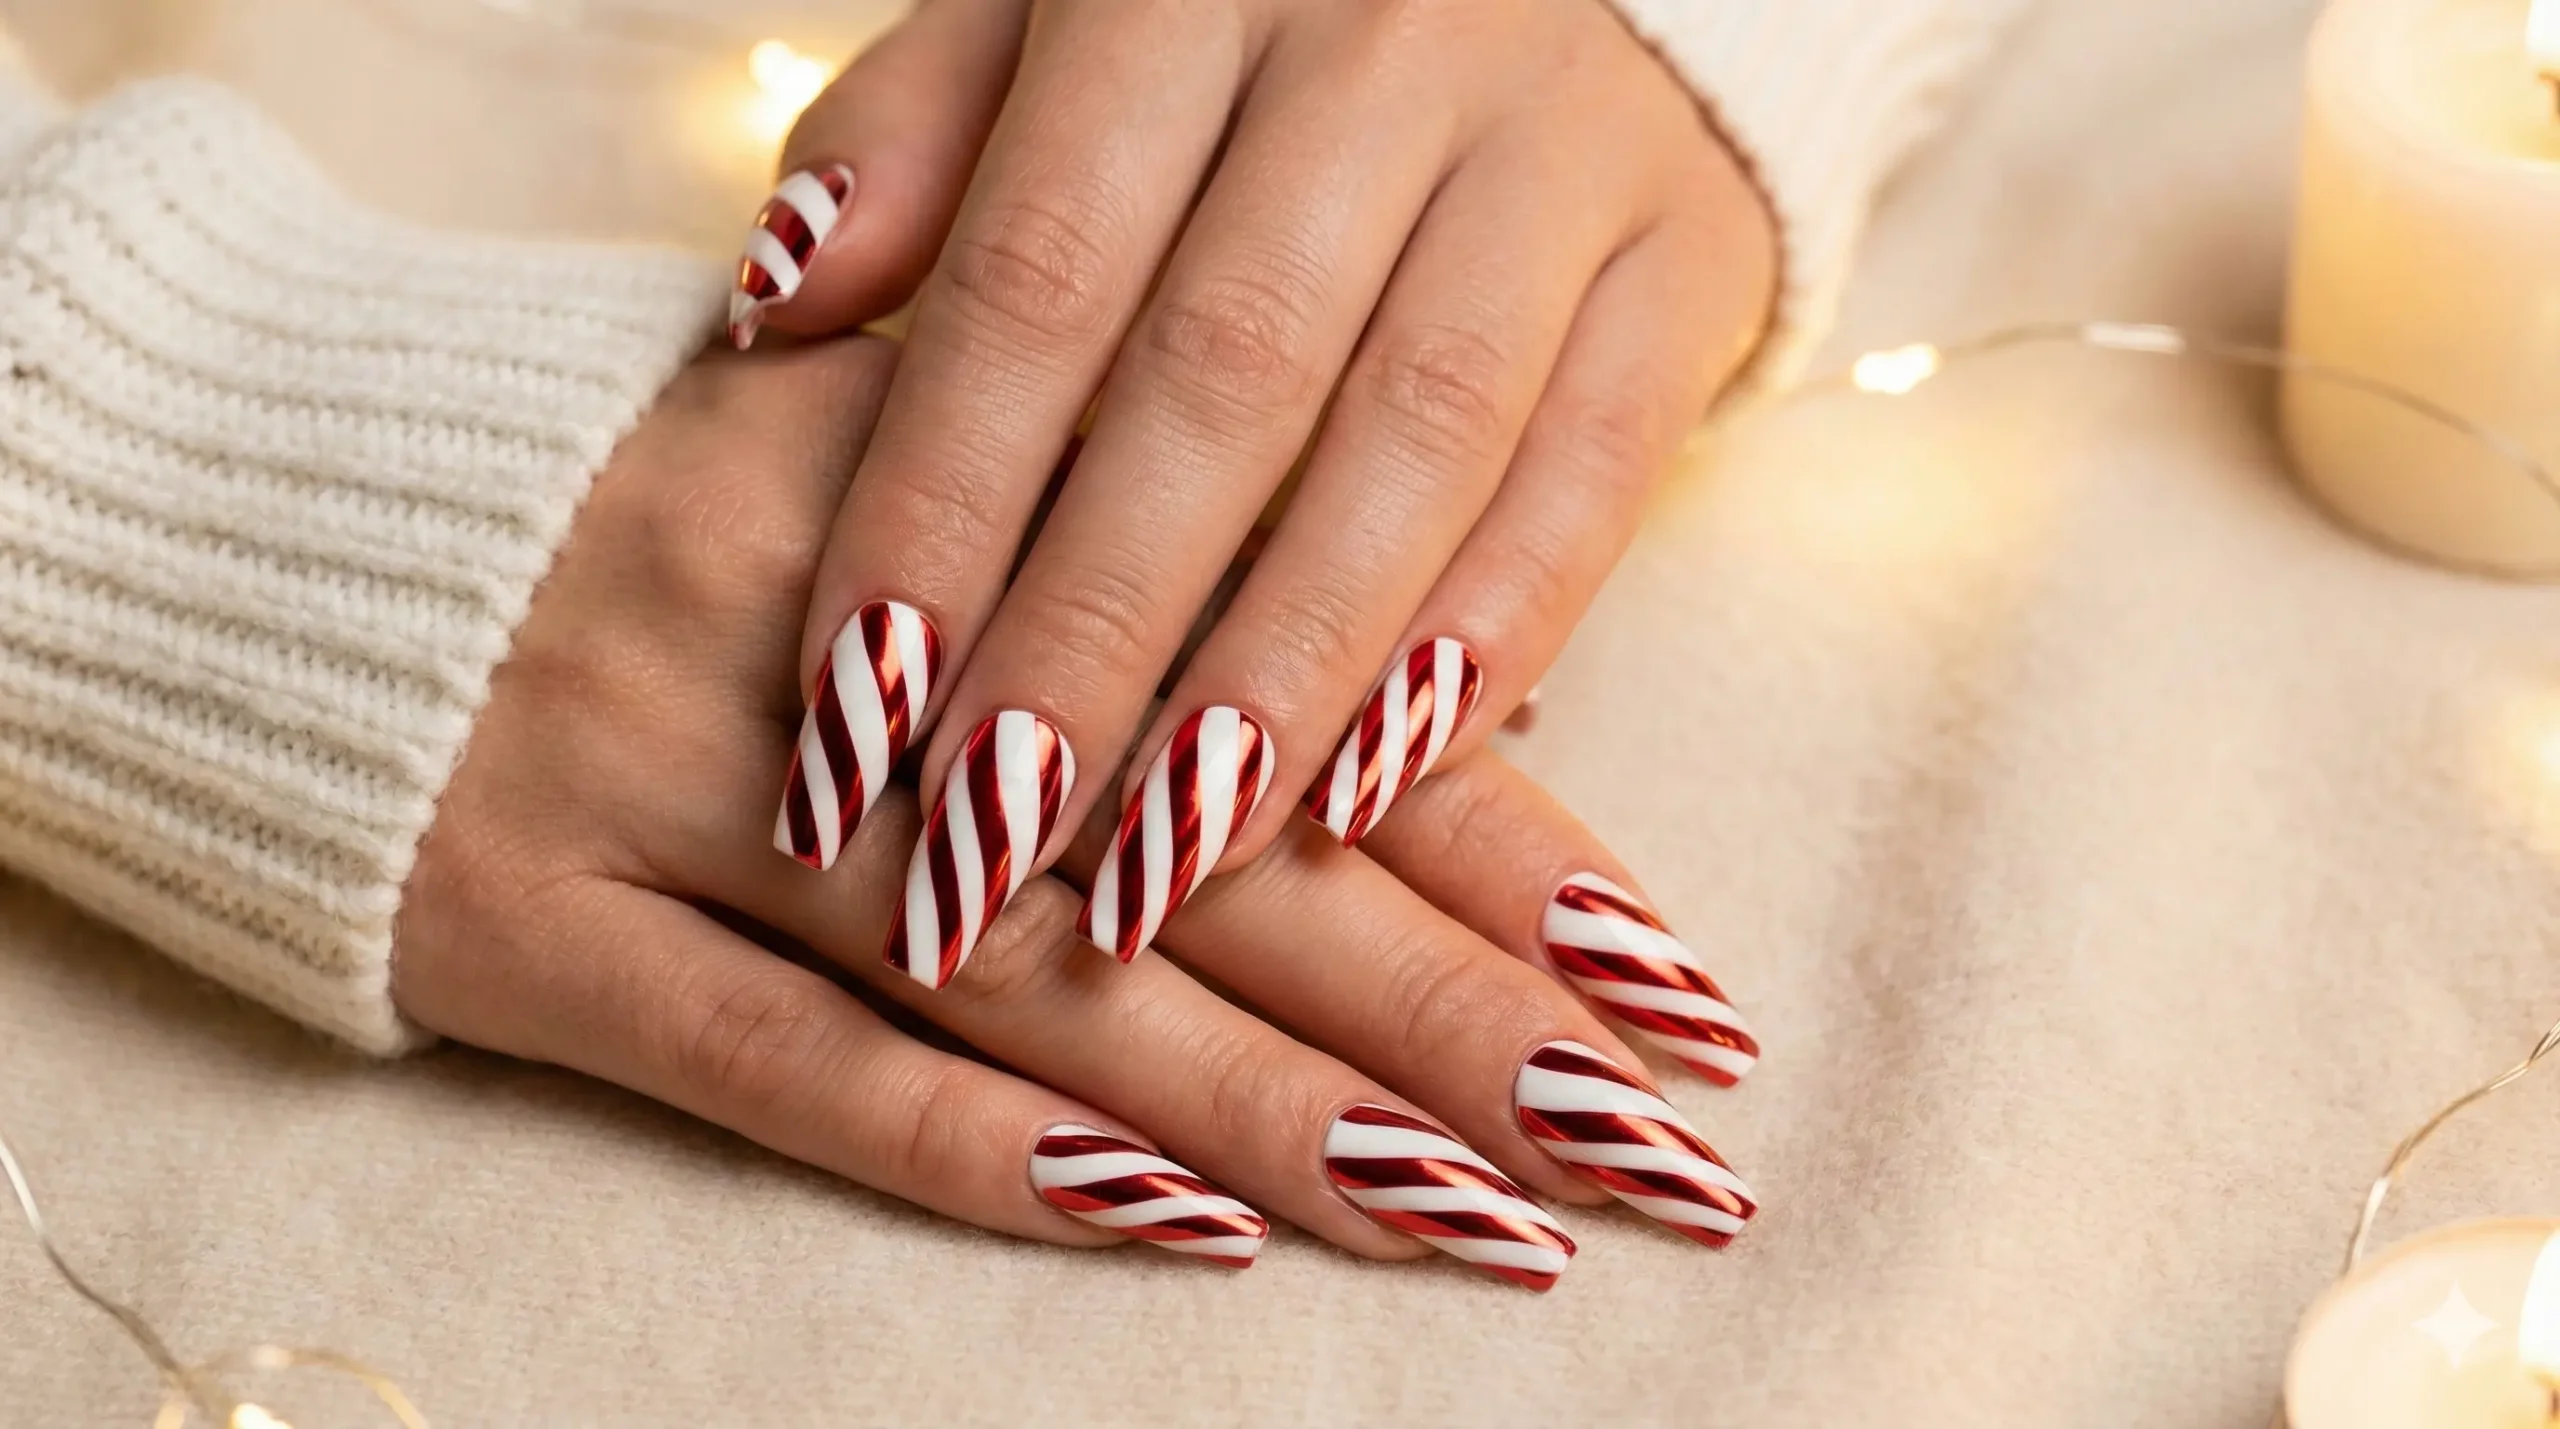
Main Points
- Liquid mirror chrome red stripes on a white base
- Futuristic, high-shine holiday glamour
- Works best on long coffin or almond shapes
How to Make This Design
- Prep nails: clean, shape, buff, and apply a dehydrator/primer if using gels.
- Apply a pure white gel base and cure according to product instructions.
- Paint candy cane stripes using a chrome red gel polish or regular red gel; cure.
- Rub chrome red powder lightly onto the red stripes (if using chrome powder) and buff for a mirror finish; clean excess powder.
- Seal with a no-wipe glossy top coat and cure to lock in the metallic shine.
- Finish with cuticle oil to hydrate the skin around the nails.
6. Glitter Candy Cane Nails
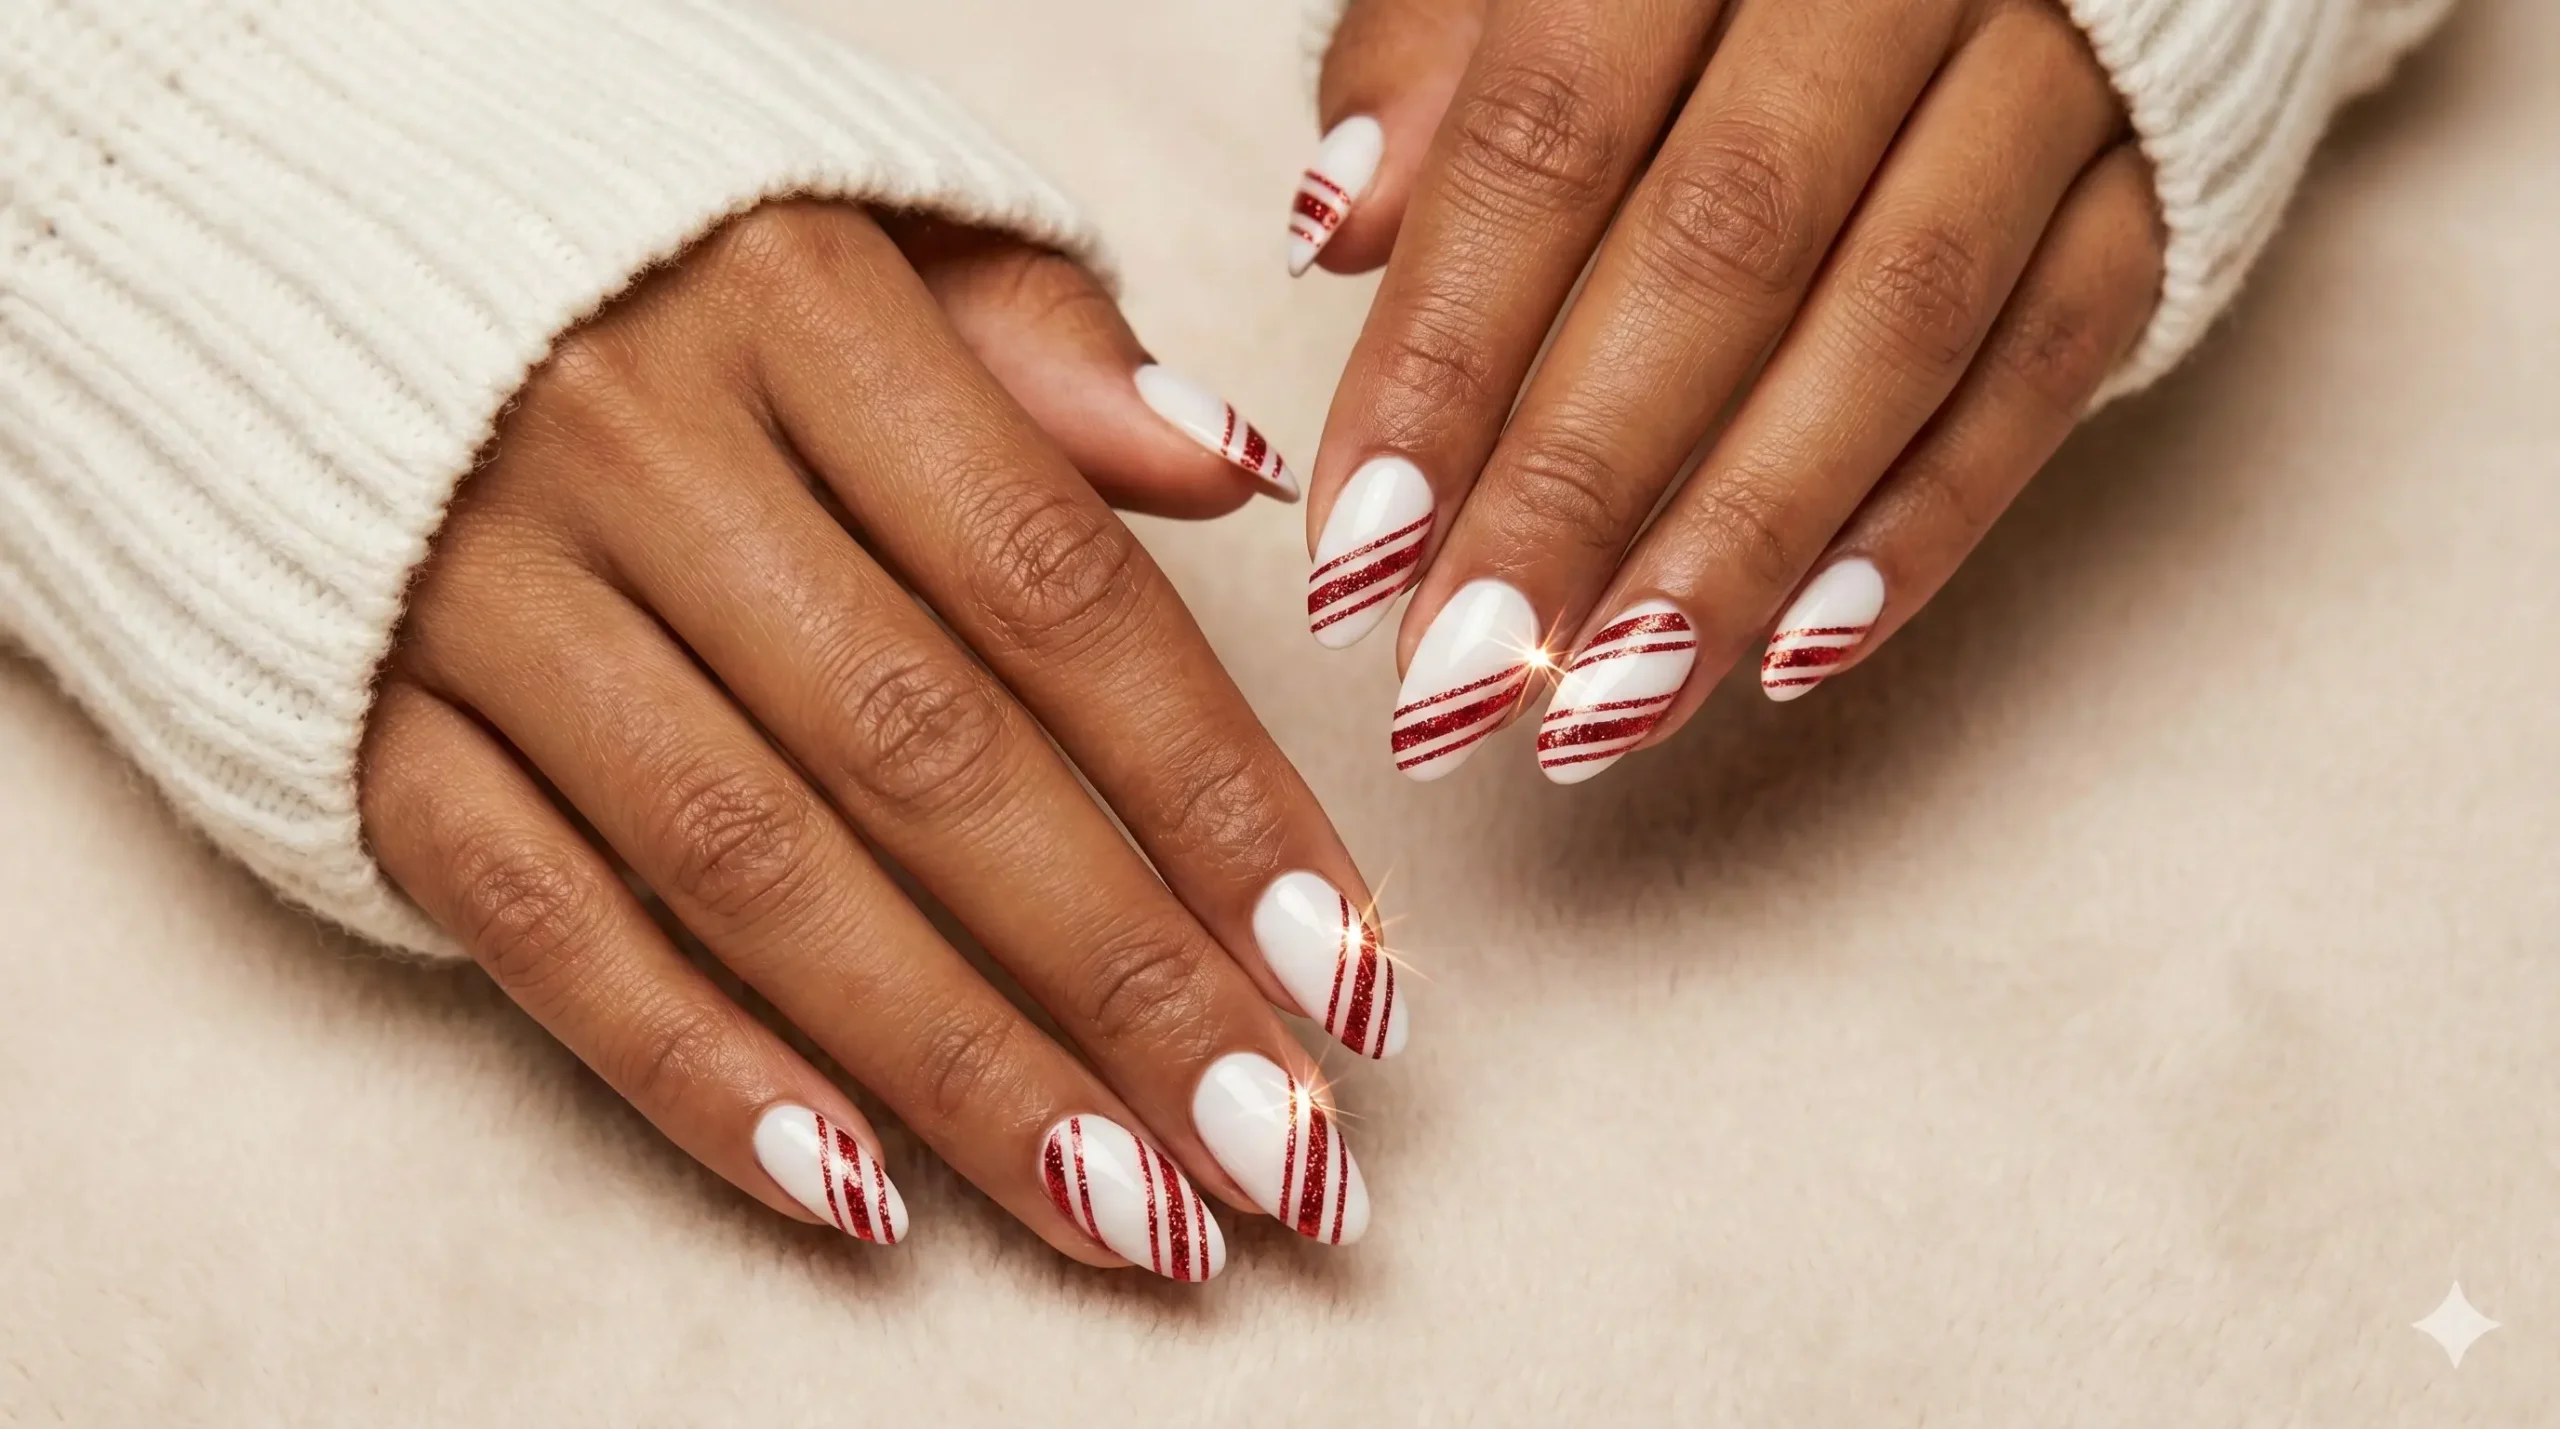
Main Points
- White base with fine red glitter stripe accents
- Festive, sparkly, and party-ready
- Great for holiday events and photos
How to Make This Design
- Prep and apply a smooth white gel or polish base; cure/dry fully.
- Using a striping brush or tape, apply a thin line of clear gel where you want the glitter stripe.
- While tacky, sprinkle or press fine red glitter onto the gel stripe, or paint the stripe with a red glitter gel polish.
- Tap off excess glitter and gently clean edges with a small brush dipped in remover if needed.
- Apply a thick glossy top coat to lock the glitter in and create a smooth surface; cure as required.
- Finish with cuticle oil for shine and nourishment.
7. Matte Red With Glossy Candy Cane Stripes

Main Points
- Deep matte velvet red base contrasted with glossy candy cane stripes
- High-fashion texture contrast that’s very on-trend
- Works on medium to long nail lengths
How to Make This Design
- Prep nails and apply two coats of a deep red gel polish; cure each coat.
- Apply a matte top coat and cure to achieve the velvet finish.
- Carefully paint candy cane stripes using a thin brush and a glossy clear top coat or glossy red gel on top of the matte surface.
- Cure only the glossy stripes if using gel to retain high-shine contrast against the matte background.
- Clean any edges and apply cuticle oil to finish the look.
8. Peppermint Swirl Accent Nail
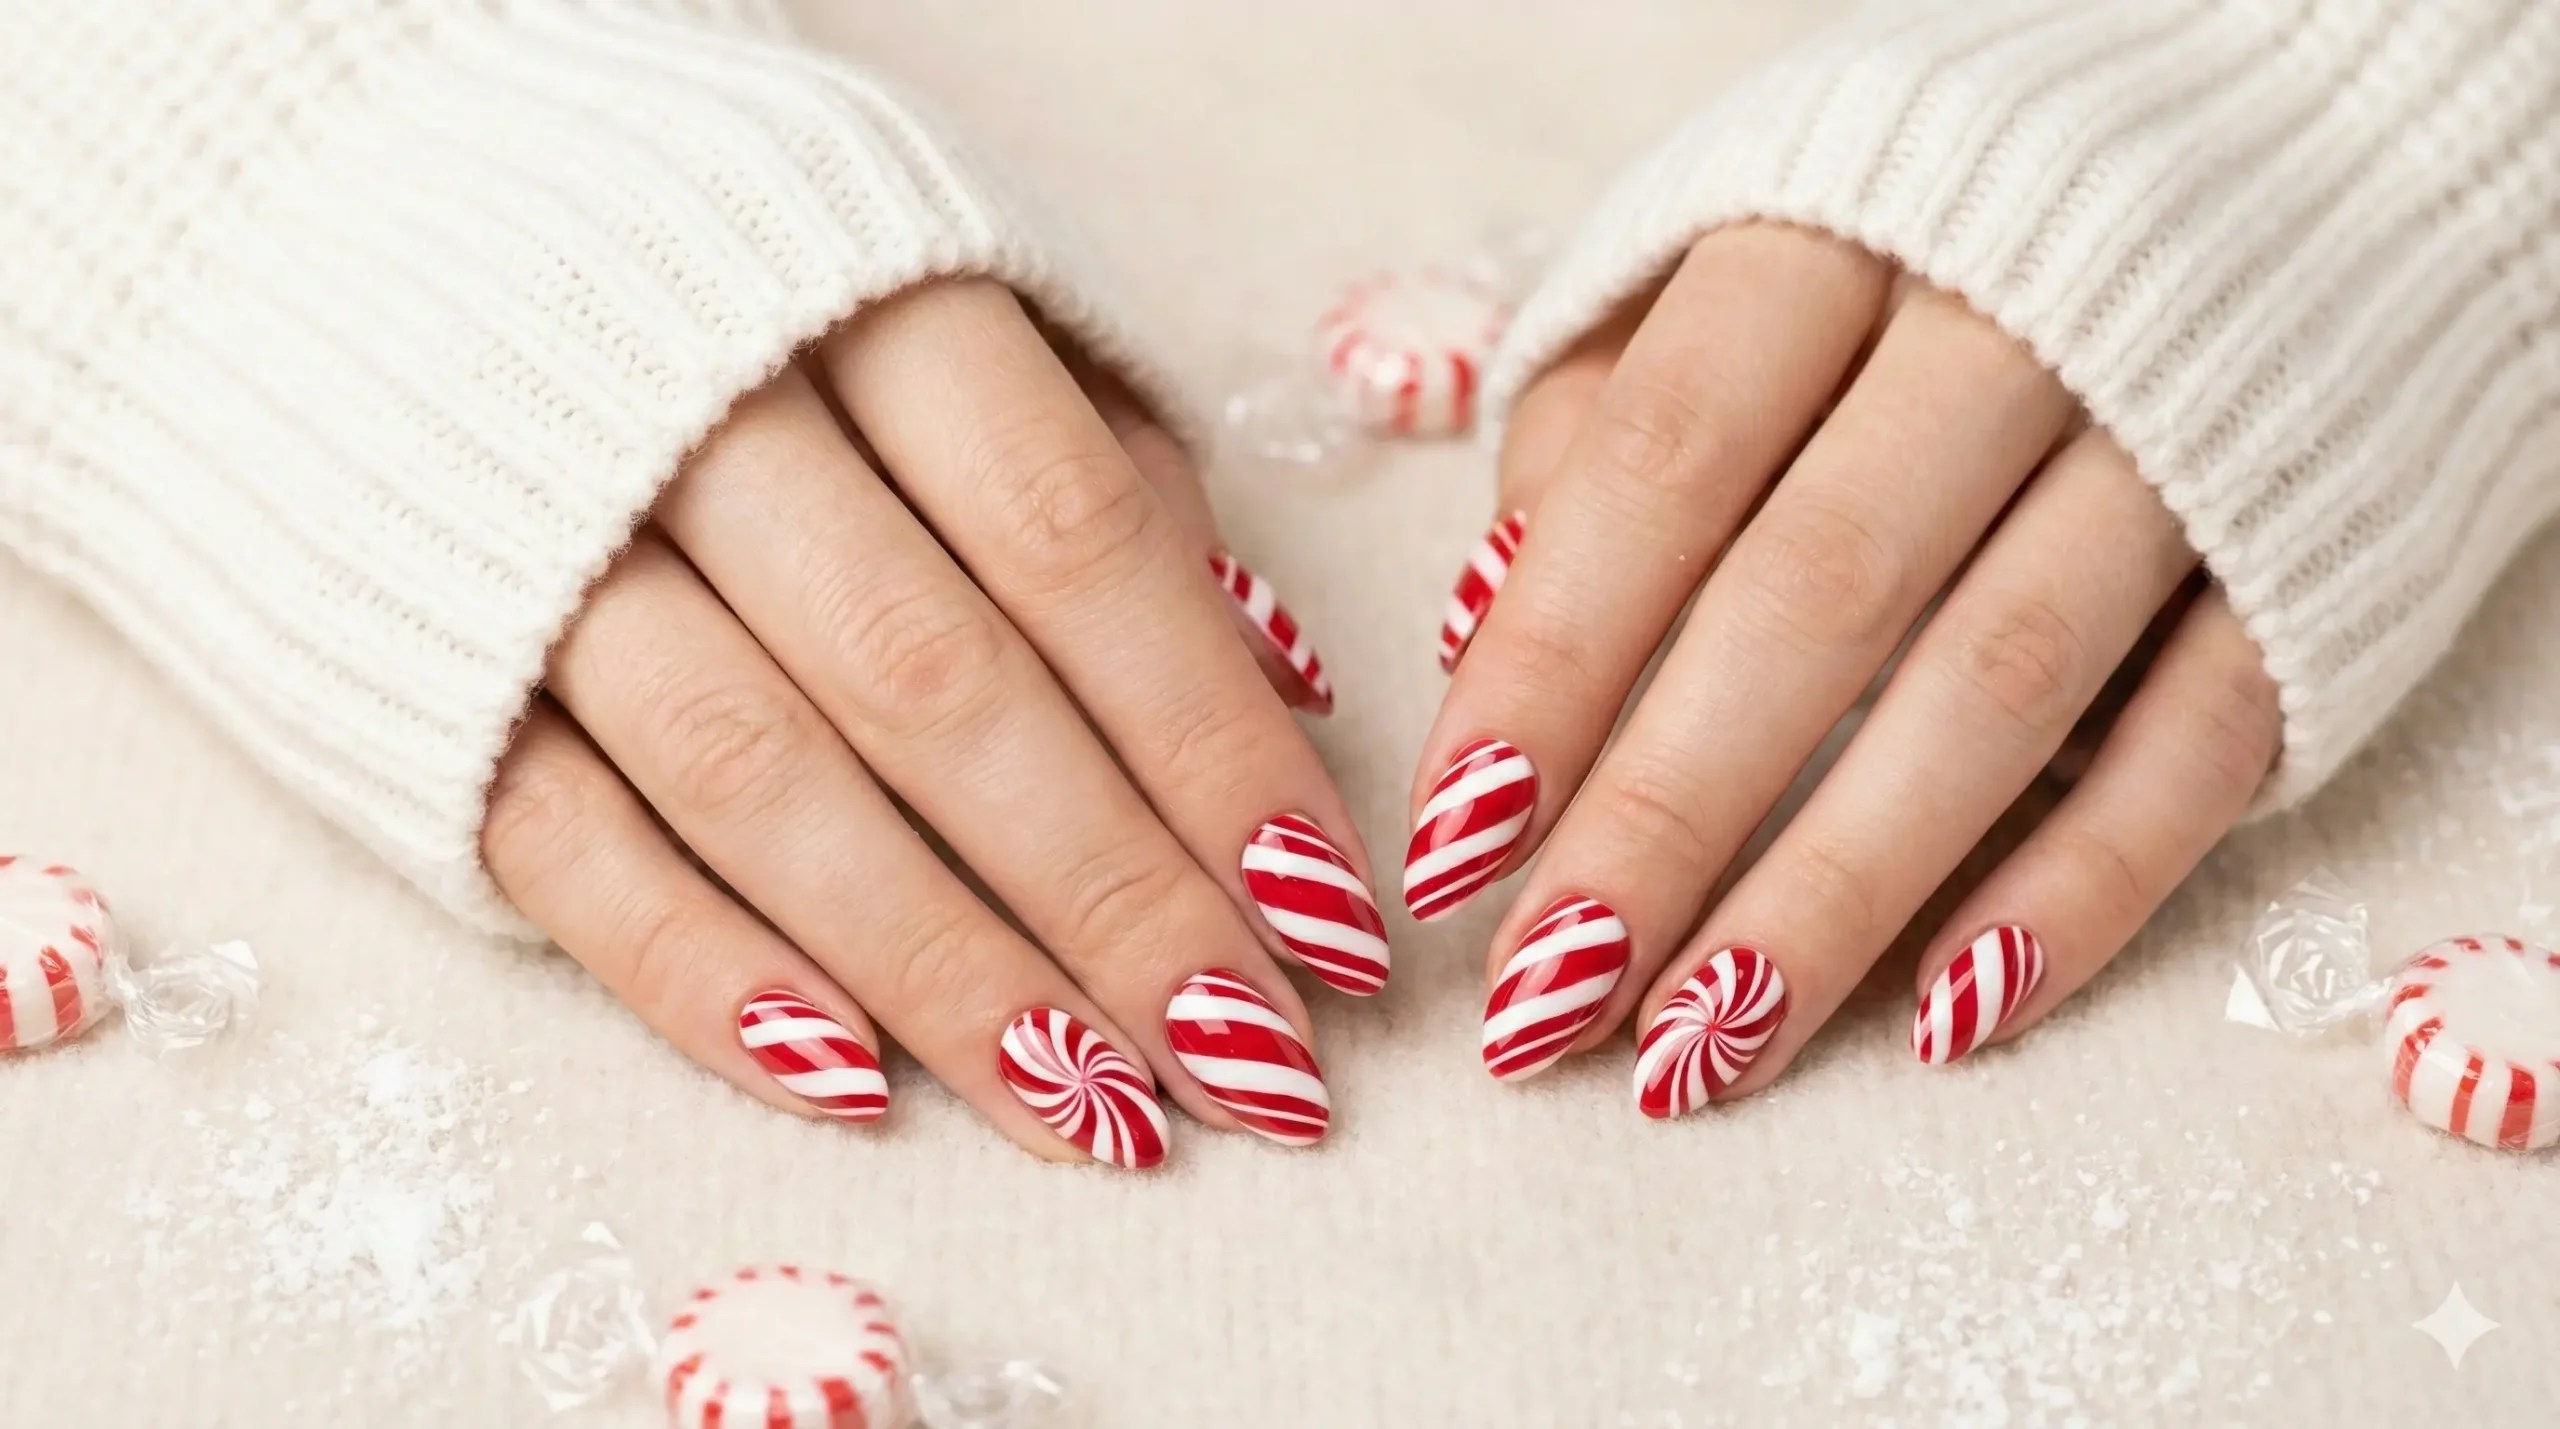
Main Points
- Peppermint swirl accent nail paired with candy cane stripes
- Bakery-inspired, playful holiday look
- Works well as a single accent with complementary striped nails
How to Make This Design
- Prep nails: clean, shape, and apply a white or light nude base; cure or dry fully.
- On the chosen accent nail, paint a tight spiral starting from the center using red gel/polish, then paint alternating white rings to form the peppermint swirl. Use a fine brush for control.
- On remaining nails, create classic candy cane stripes with a detail brush or striping tape.
- Seal all nails with a glossy top coat and cure or dry as required.
- Finish with cuticle oil and gentle hand massage for a polished appearance.
9. Candy Cane Heart Tips
Main Points
- French tips form tiny candy cane heart halves at each nail edge
- Romantic, whimsical holiday manicure perfect for date nights
- Looks great on short to medium-length nails
How to Make This Design
- Apply a smooth nude or sheer pink base and cure/dry.
- On each tip, paint two small curved candy-cane-style stripes that meet in the center to form a heart shape—use red and white alternating lines for the candy-cane effect.
- Refine the heart shape with a dotting tool or ultra-fine brush to ensure symmetry.
- Apply a glossy top coat to seal the art and add shine.
- Hydrate cuticles with oil to complete the look.
10. Negative Space Candy Cane Lines
Main Points
- Deliberate clear (negative) spaces between red candy cane stripes
- Modern, minimalist editorial vibe
- Great for short nails or anyone who prefers understated holiday looks
How to Make This Design
- Prep nails and apply a clear or sheer nude base; cure or dry.
- Use striping tape or a fine brush to place red candy cane stripes, leaving deliberate gaps of bare nail between each stripe to create negative space.
- Remove tape carefully (if used) and clean any stray polish with a tiny brush and remover.
- Finish with a glossy top coat to protect the design and even out the surface.
- Apply cuticle oil to nourish surrounding skin.
11. Candy Cane Border Nails
Main Points
- Red and white candy cane stripes outlining the nail border
- Minimalist yet eye-catching style
- Nude center keeps the look clean and modern
How to Make This Design
- Apply a sheer nude or clear base and allow it to dry or cure.
- Using a fine liner brush, carefully paint a thin candy cane border along the edges of each nail—alternate red and white strokes for a striped outline.
- Perfect the shape by ensuring the border follows the natural curvature of the nail.
- Apply a glossy top coat to smooth and seal the outline design.
- Finish with nourishing cuticle oil.
12. Candy Cane + Snowflake Micro Art

Main Points
- Classic candy cane stripes paired with micro-sized snowflakes
- Extremely detailed winter nail art
- Great for photoshoots and holiday-themed nail sets
How to Make This Design
- Apply a white or nude gel base and cure fully.
- Create red candy cane stripes using a thin brush for crisp lines.
- On one or two accent nails, paint tiny snowflakes using a micro-detail nail brush and white gel polish.
- Add subtle dot details to enhance the snowflake effect.
- Seal with a glossy top coat to protect the intricate artwork.
- Apply cuticle oil to complete the set.
13. 3D Gel Candy Cane Drip
Main Points
- Raised icing-like candy cane gel effect
- Playful 3D bakery-inspired nails
- High-shine dimensional finish
How to Make This Design
- Apply the base color of your choice (white, nude, or pastel look great) and cure.
- Use thick builder gel or 3D gel to form raised candy cane drips or lines across the nails.
- Create alternating red and white stripes on the raised gel sections for the candy cane look.
- Cure thoroughly to hold the 3D shape.
- Apply a glossy top coat over the entire nail to enhance the dimensional shine.
- Finish with hydrating cuticle oil.
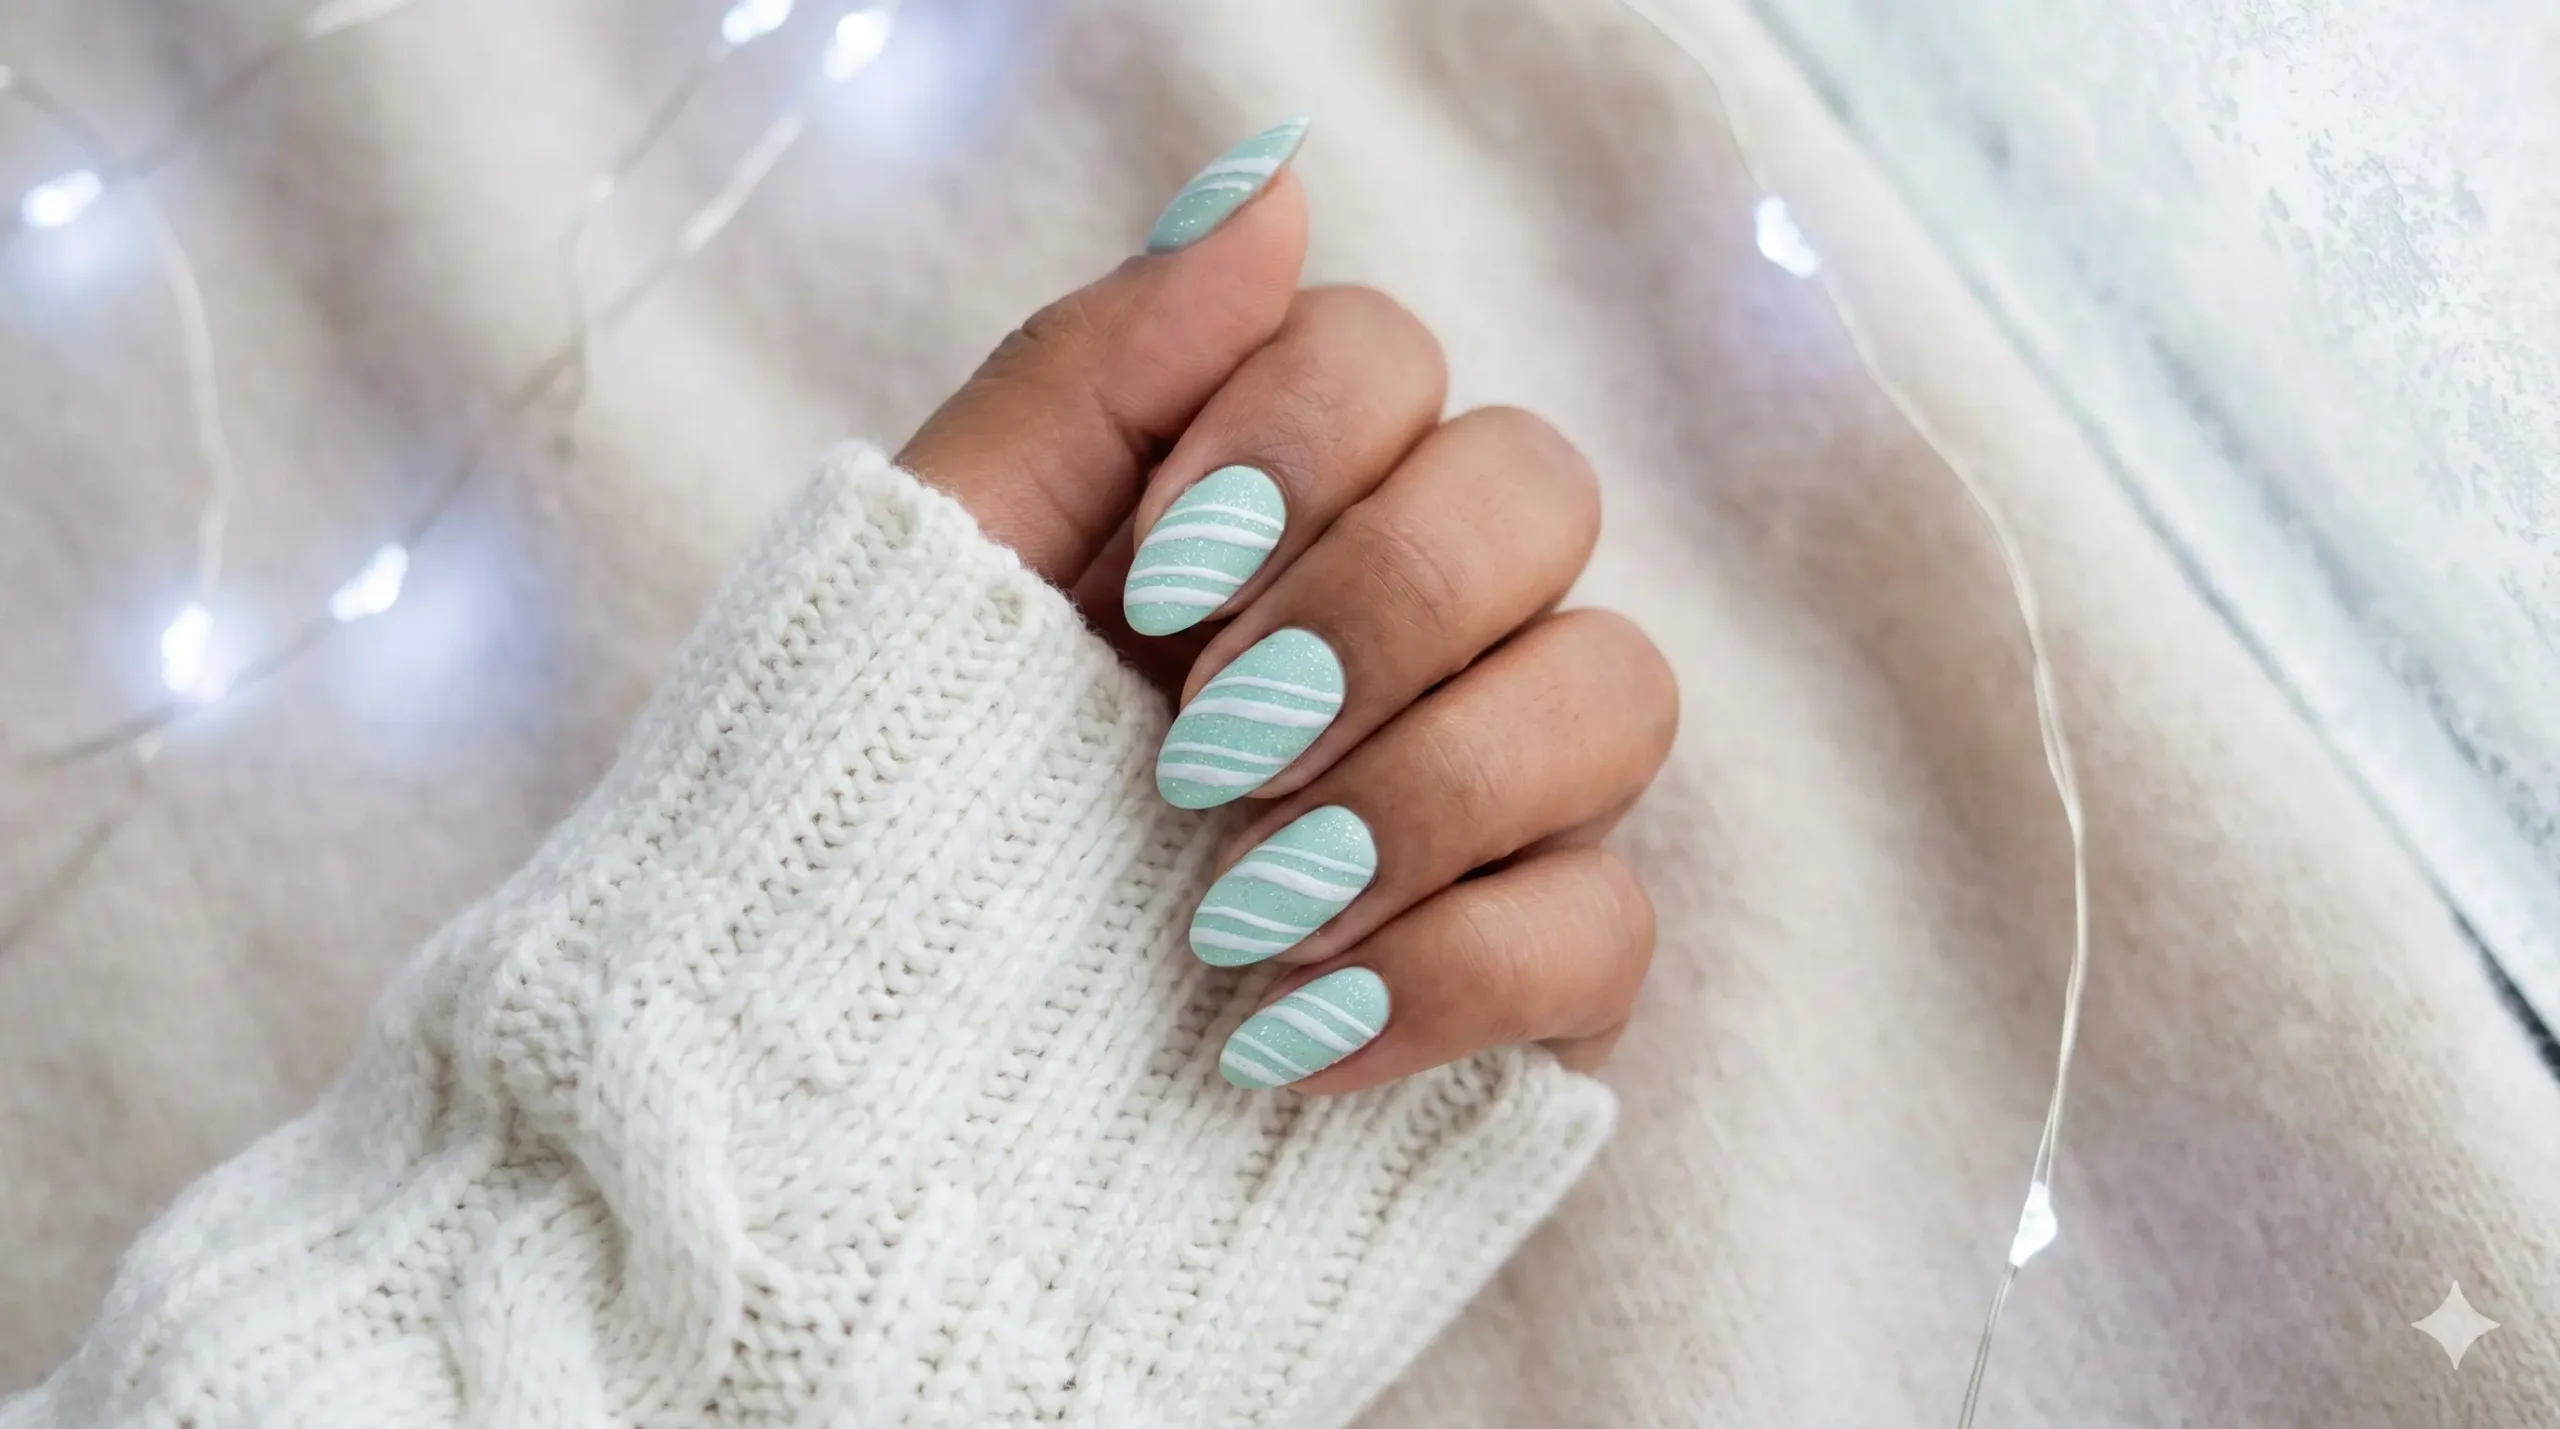
14. Mint Green Candy Cane Nails
Main Points
- Soft pastel mint base for a frosty winter feel
- White candy cane stripes for a clean, icy look
- Perfect for a softer, more modern holiday aesthetic
How to Make This Design
- Apply two coats of a pastel mint gel or polish and cure/dry completely.
- Use a thin brush to paint clean white candy cane stripes across each nail.
- Keep spacing even to maintain the modern frosty vibe.
- Seal with a glossy top coat to make the mint shade pop.
- Finish by applying cuticle oil for hydration and shine.
15. Ombre Red-to-White Candy Cane
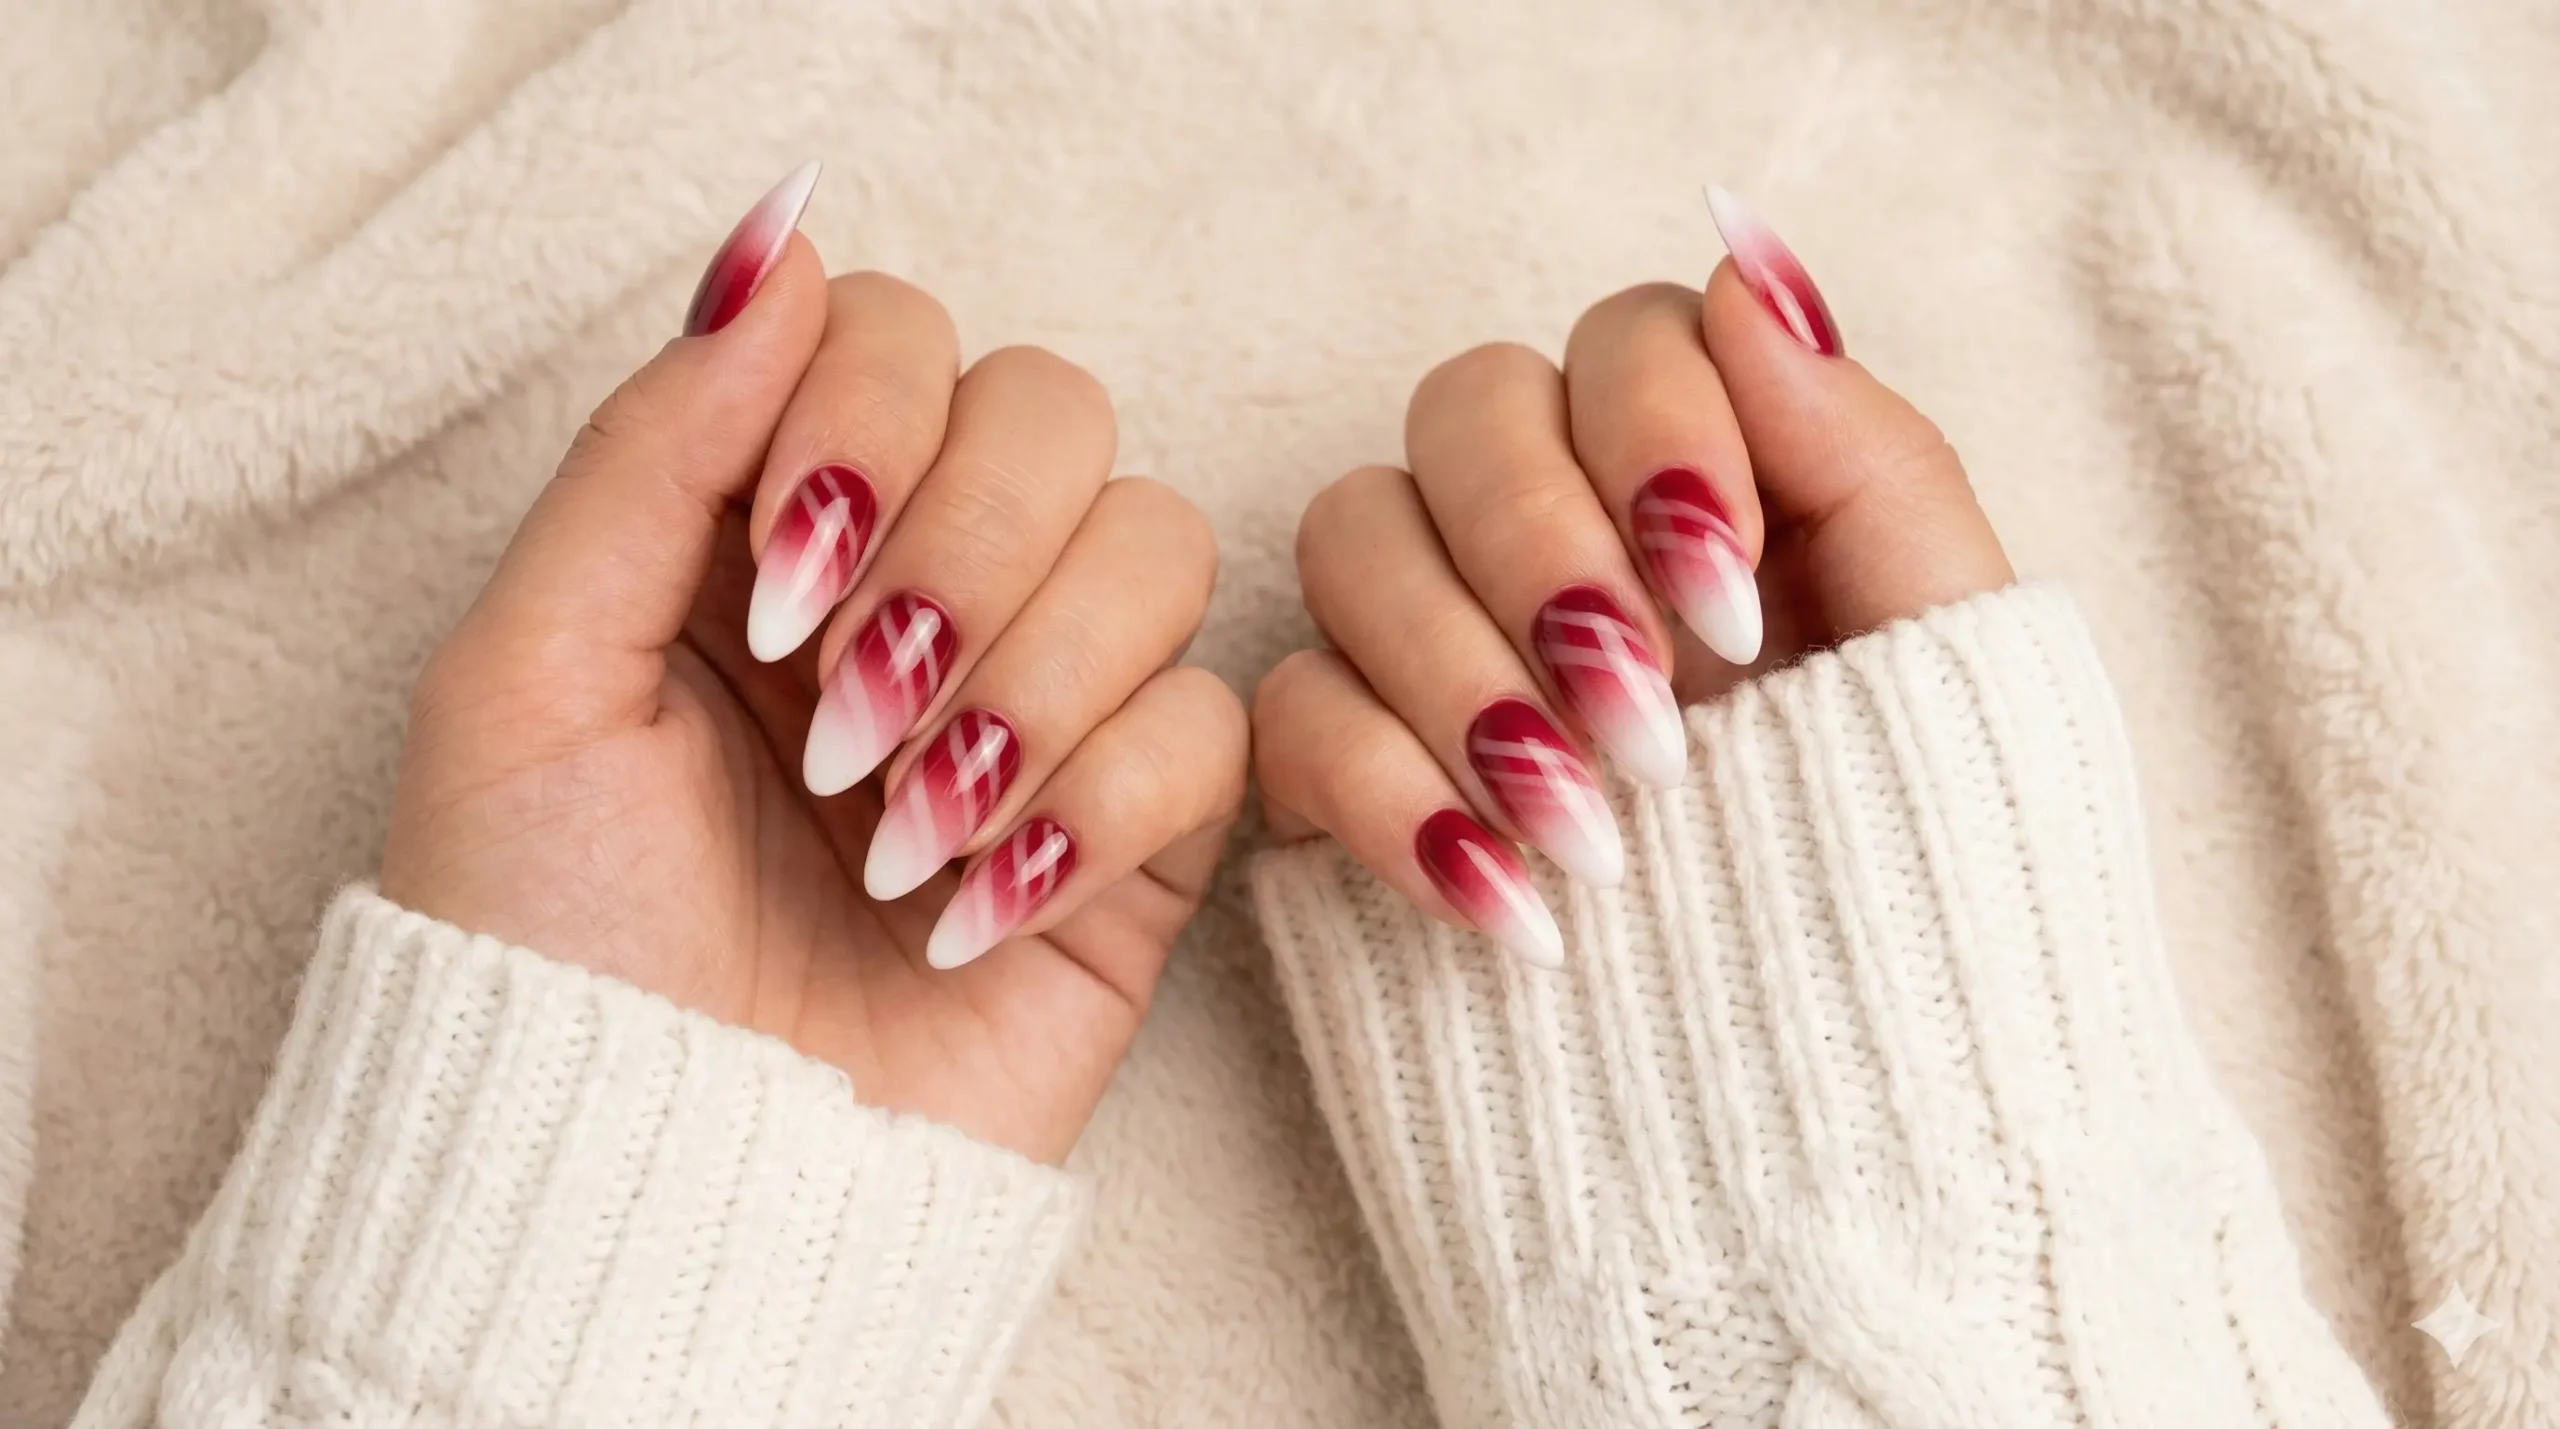
Main Points
- Soft gradient blending cranberry red into snowy white
- Candy cane stripes layered over the ombre for extra depth
- Elegant, smooth, and perfect for holiday parties
How to Make This Design
- Apply a white base and cure; then use a sponge or airbrush to blend cranberry red from the tip toward the center.
- Repeat blending layers until the gradient is seamless; cure between layers if using gel.
- Use a fine brush to add thin candy cane stripes on top of the ombre.
- Seal with a glossy top coat to enhance the gradient and add depth.
- Finish with cuticle oil for a hydrated, professional finish.
16. Candy Cane + Gold Foil Luxe

Main Points
- Classic candy cane stripes paired with thin gold foil detailing
- Luxurious, high-end festive manicure
- Eye-catching accent perfect for holiday events
How to Make This Design
- Paint red and white candy cane stripes on a nude or white base; cure or dry fully.
- Using gold foil gel adhesive, apply ultra-thin strips of gold foil along selected stripe edges.
- Press foil gently to ensure it adheres cleanly without wrinkles.
- Apply a thick glossy top coat to lock in the foil and enhance the luxe finish.
- Finish with nourishing cuticle oil to complete the look.
Affiliate Disclaimer: This post contains affiliate links. If you click through and make a purchase, FemmeGlowDaily may earn a small commission at no extra cost to you. Thank you for supporting the site!
Must-Have Tools & Products for Candy Cane Nail Designs
To recreate precise candy cane nail art, having the right tools makes all the difference. Below are essential products that help you achieve clean stripes, smooth gradients, glitter accents, chrome details, and durable finishes.
- Fine detail nail art brushes (liner brushes, micro-detail brushes)
- Striping tape for crisp straight lines
- Red, white, and pink gel Christmas polishes
- Pastel and nude base gels or polishes
- Fine glitter gel polish or loose fine glitter
- Chrome powder (red/chrome shades) and applicator
- Matte top coat & glossy top coat
- UV/LED lamp for curing gel polish
- Builder gel or 3D gel for raised designs
- Gold foil sheets and foil adhesive (for luxe accents)
- Dotting tools and thin striping brushes
- Cleanup brush and acetone or gel cleanser for tidy edges
- Cuticle oil and hand cream for finishing touch
Conclusion
Candy cane nails are a festive classic with countless modern variations — from minimalist negative-space designs to luxe gold-foil accents and 3D gel details. Whether you’re DIY-ing at home or briefing a nail tech, these 16 designs give you a spectrum of looks for every holiday vibe. With the right tools and a little patience, you can recreate scroll-stopping manicures that turn heads this season.
Ready to try a few? Pick one design from above, gather the tools listed, and have fun experimenting. Don’t forget to take close-up photos — candy cane details pop on camera!

Beauty Blogger & Nail Art Enthusiast
Love discovering trending nail designs, seasonal manicure ideas, and glow-boosting beauty tips?
👉 Subscribe to the GlowList